Posts Categorized: Recipes

Here’s to a Healthier New Year: Two Ways to Cook with Wine

January is definitely a time of reflection and revision, a chance to clear out all the excesses that seem to pile up during the holiday months. Gym memberships are on the rise and most people are looking for ways to cut calories and just generally start this year healthier than they ended the last one.
 
Lots of people even (gasp) take a hiatus from drinking. Now, you might think that being winemakers we would hold this practice anathema, but on the contrary, here at Union we support that 100%. A little break is always a good thing to realign mind, spirit and body. And if this includes a short sojourn into teetotaling, then have at it. But we would be remiss if we didn’t mention there are many other, specifically culinary uses for our wines that will help you stick to your resolutions by making your healthy choices that much more delicious.
 
This week we present two recipes that each employ the use of our Underwood Pinot Noir. The first is an arugula salad with red wine vinaigrette; the second is oven-roasted lentils with red wine and winter vegetables. Both recipes are well rounded, healthy options to bolster your January resolutions.

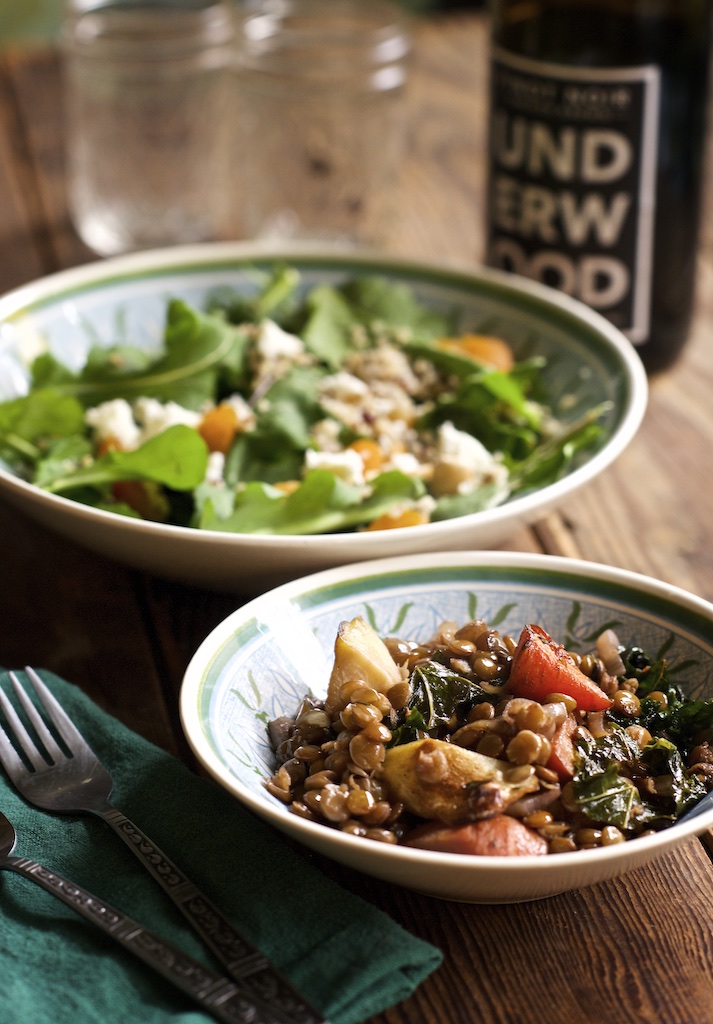
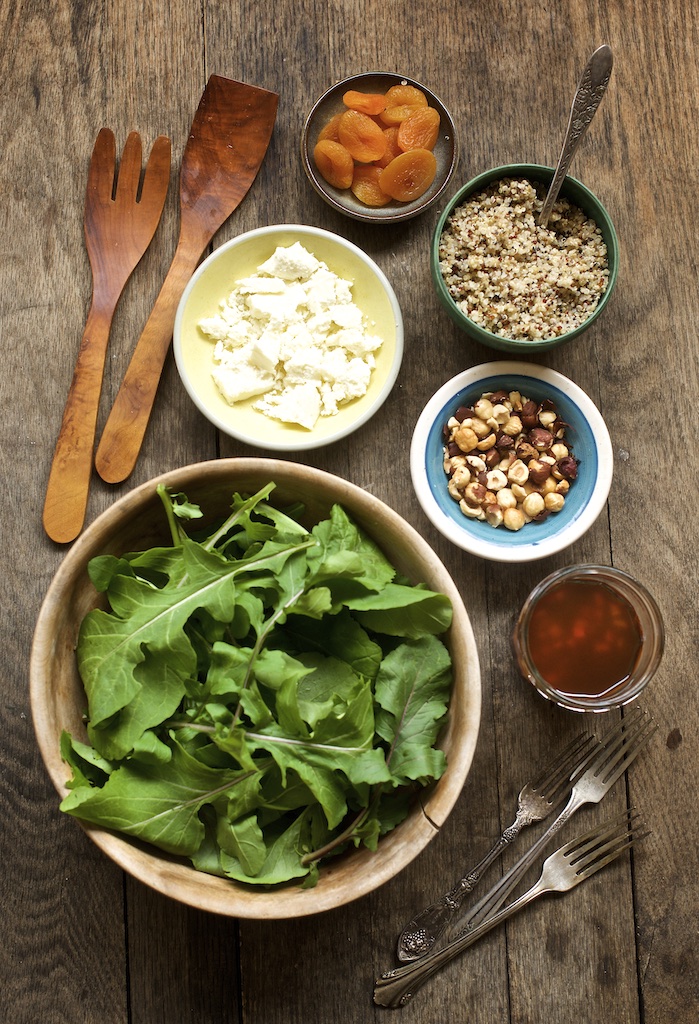
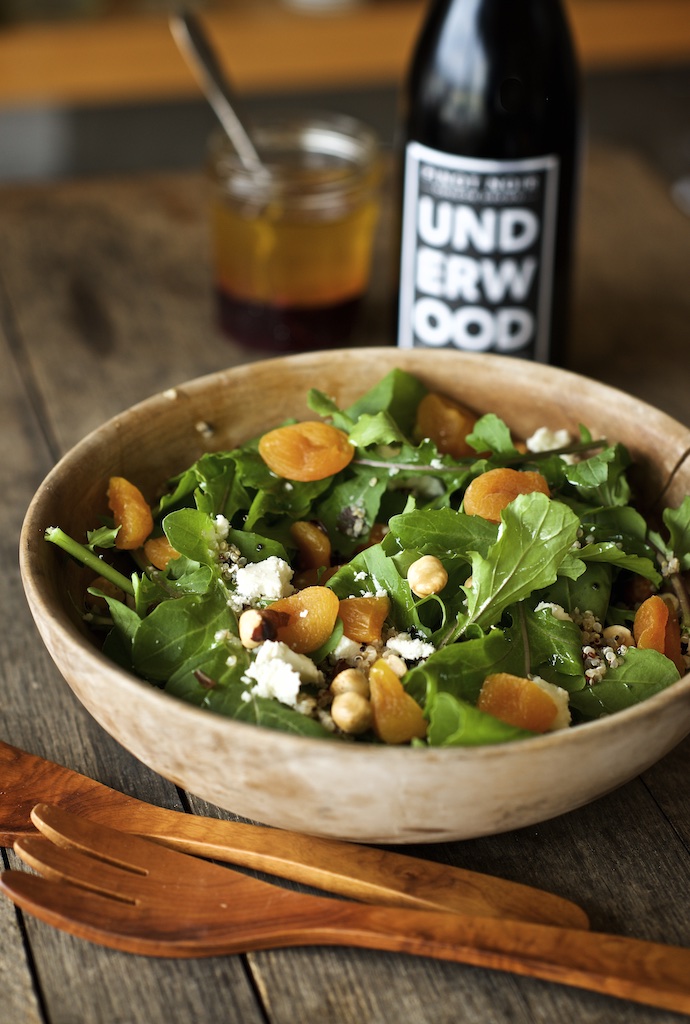
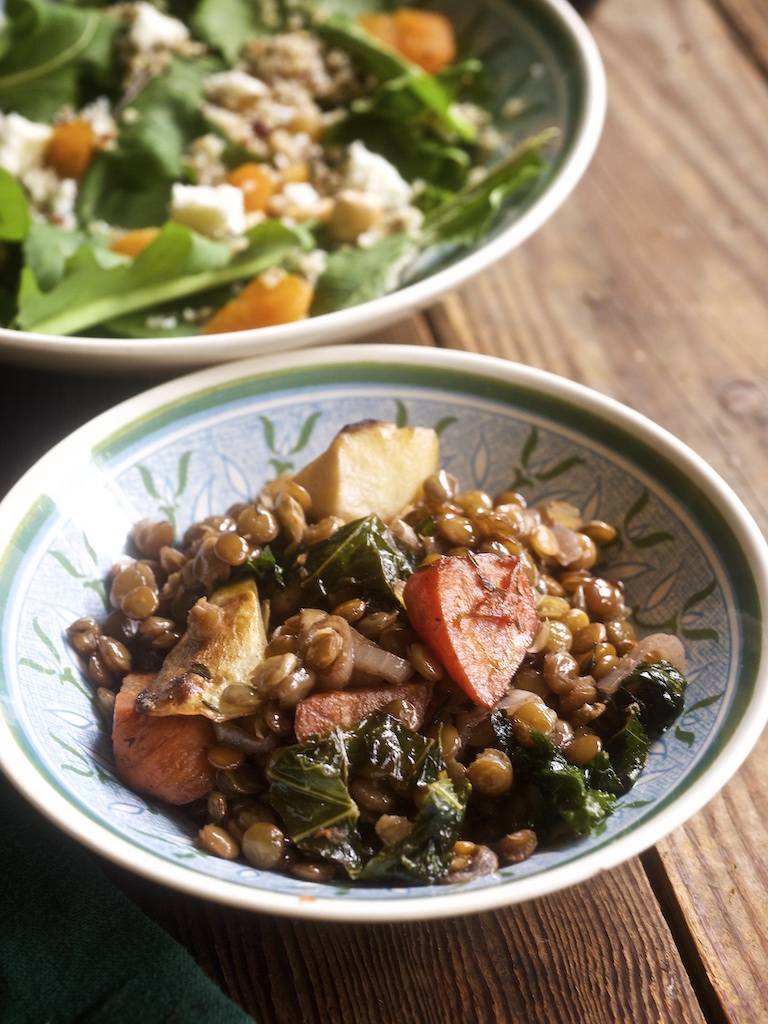
Arugula Salad with roasted hazelnuts, quinoa, dried apricots, ricotta salata and a red wine vinaigrette 


For the salad, you will need:
1 large bunch of Arugula
1 C roasted hazelnuts
1 C cooked quinoa
1/2 C quality dried apricots
1/2 C ricotta salata cheese (or other crumbly salty cheese)
For the vinaigrette, you will need:
6 oz olive oil
2 oz red wine vinegar
2 oz Underwood Pinot Noir
juice of half a lemon
1/4 of a shallot, peeled and diced
1/2 t white sugar
salt and pepper

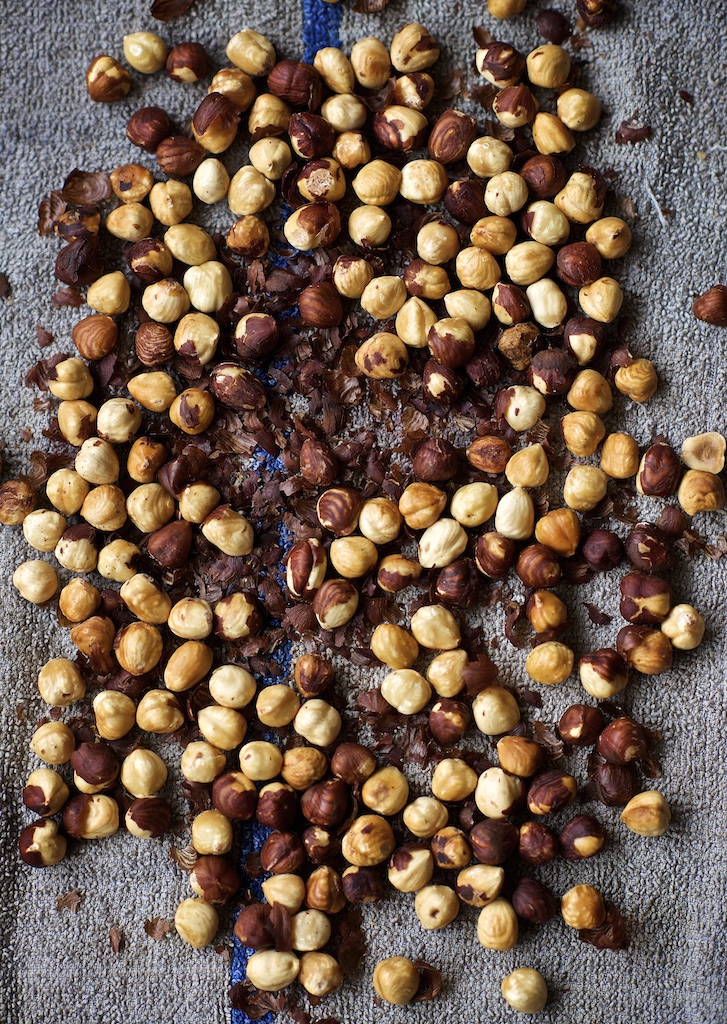
Kitchen Tip: How to skin hazelnuts

In most supermarket bulk sections, you can buy raw hazelnuts. These come with the skin on them. It’s okay to eat the skin, but much more delicious if most is removed. There is a very simple way to do this. First, roast the hazelnuts in a pan at 350 degrees until they just begin to darken. Let them cool slightly and then, in batches, place the nuts in a rough kitchen towel, vigorously rubbing to remove the skins. Pick out the skinned ones and repeat with all nuts until they are mostly skin free. (Some skin will always remain no matter how diligently you do this.)

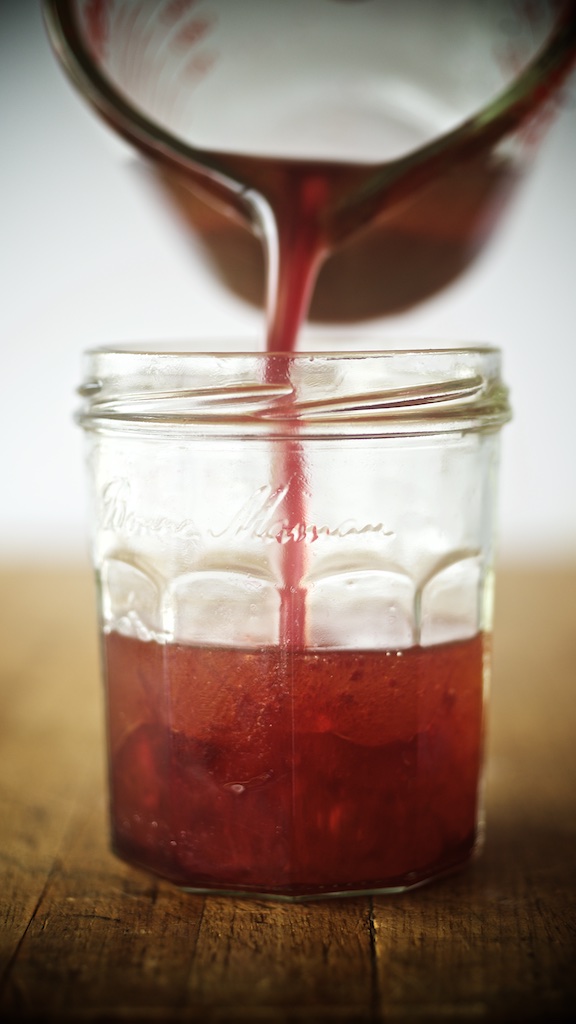
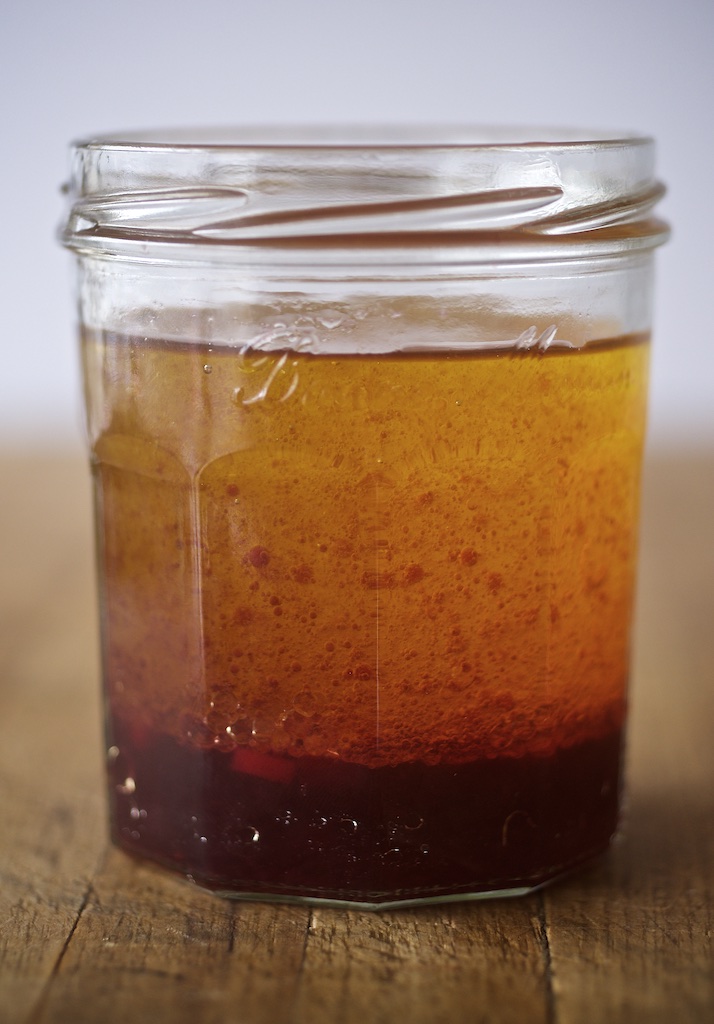
Making the vinaigrette

Simply combine all the ingredients in a measuring cup and then transfer to a glass jar for storage. Since there are no eggs or dairy in the vinaigrette, it will stay good for a long time. You can store this in the refrigerator or the pantry. Shake well before using.

To finish the dish, dress the arugula in a bowl with the vinaigrette and then add all the other ingredients. And Voila!


Next up….

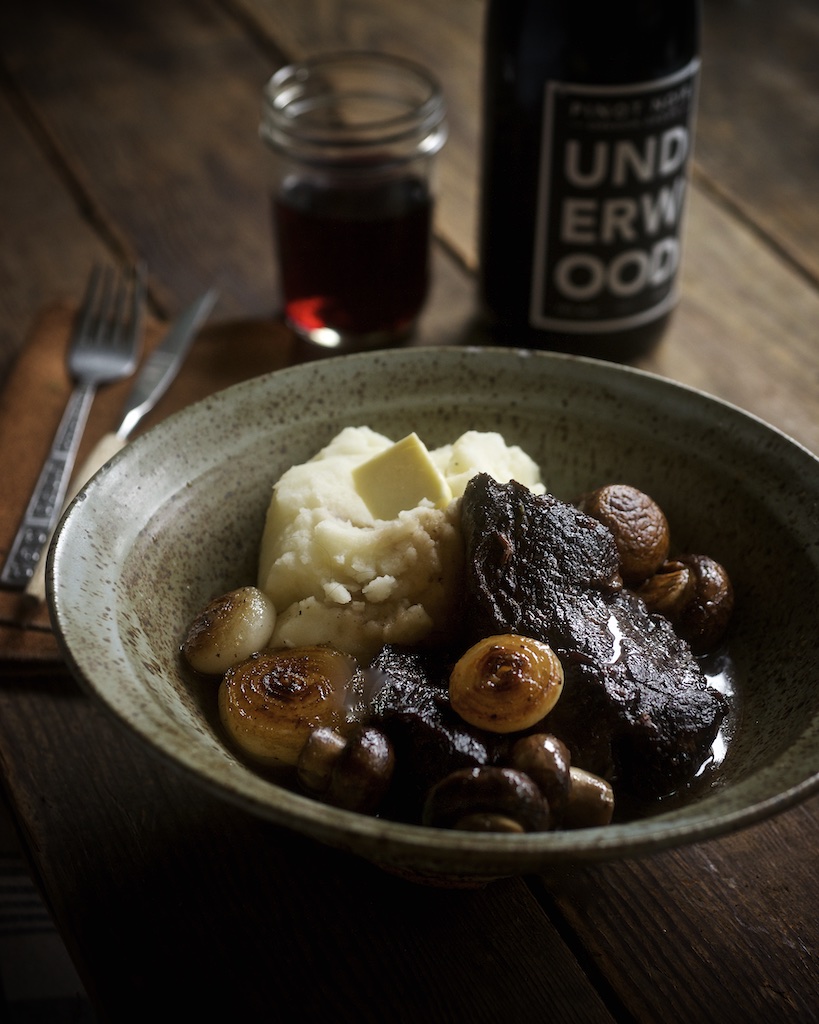
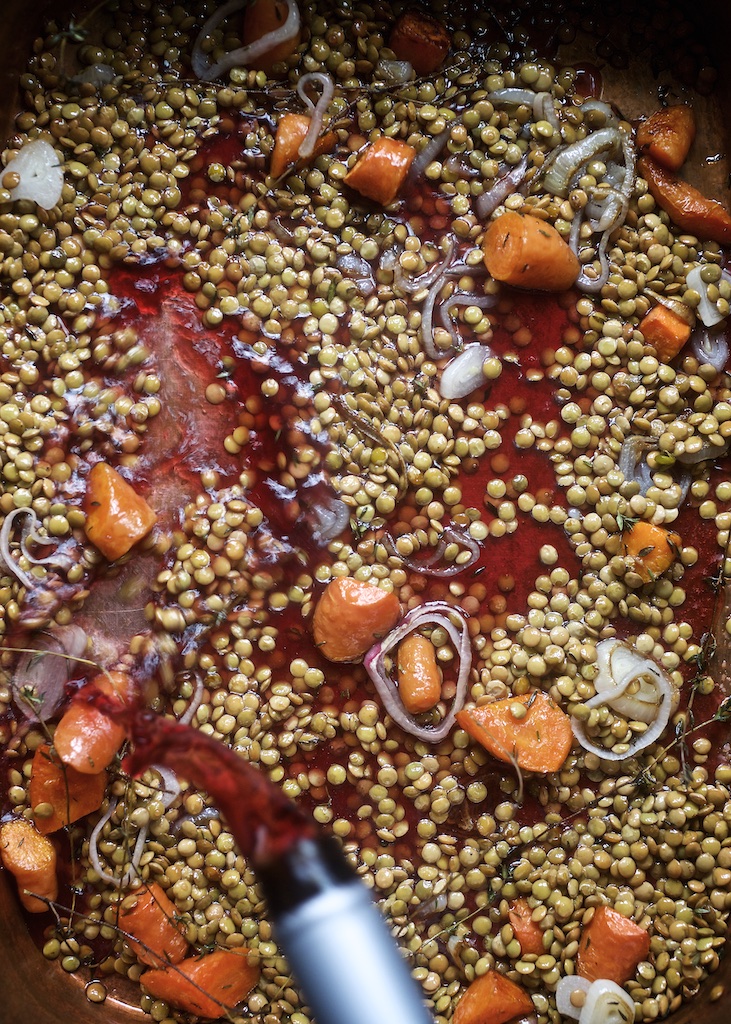
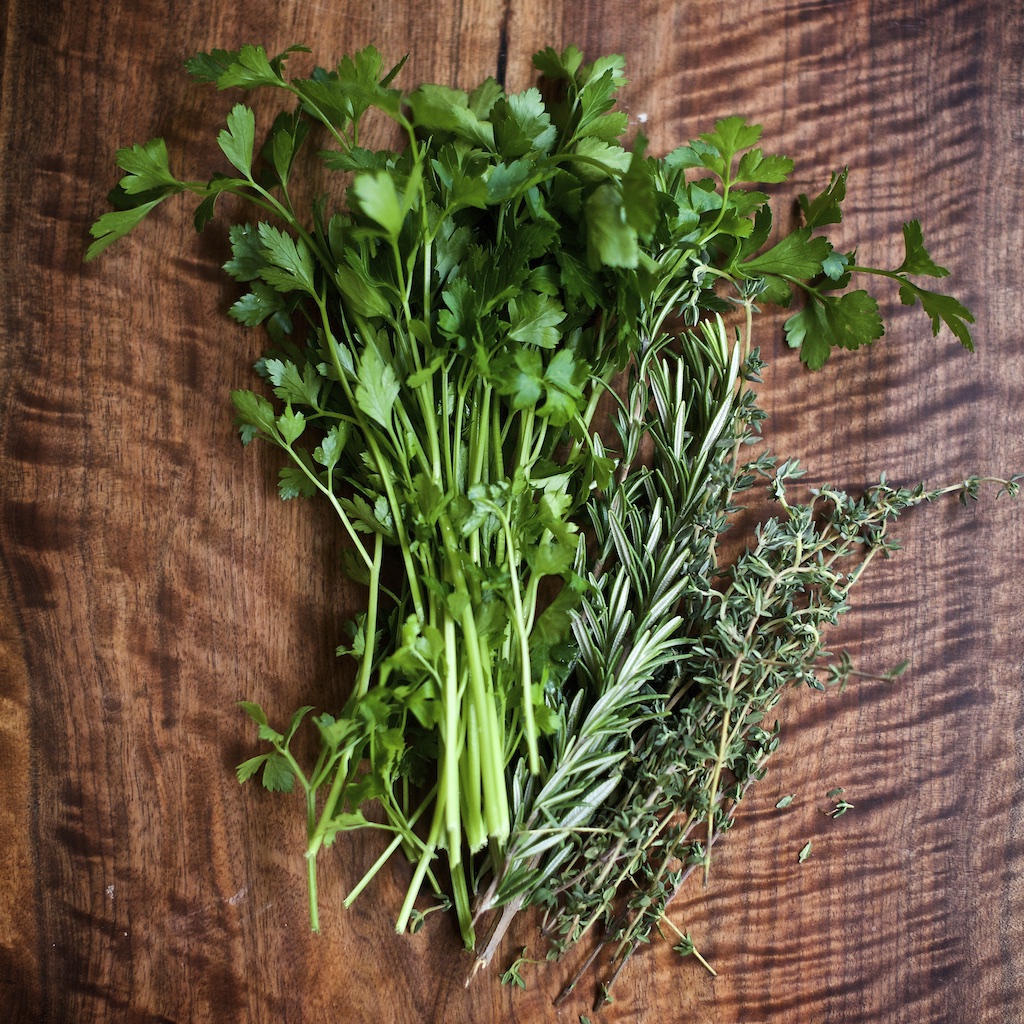
Oven Roasted Lentils with red wine, thyme and winter vegetables

For the uninitiated, lentils are in the legume family and come in three main color types, black, green and red. I recommend the green for this dish because I find them to be the most hearty. You can boil lentils,  but roasting them in the oven gives them a much richer flavor. (I was personally not a fan of lentils until I discovered this method.)


For this recipe, you will need:
1 C dried green lentils
4 C water
1 C Underwood Pinot Noir
4 sprigs fresh thyme
3 medium carrots—cut into chunks
1 large shallot—thinly sliced
2 medium parsnips
1/2 bunch of hearty kale
olive oil
salt & pepper


STEP ONE:

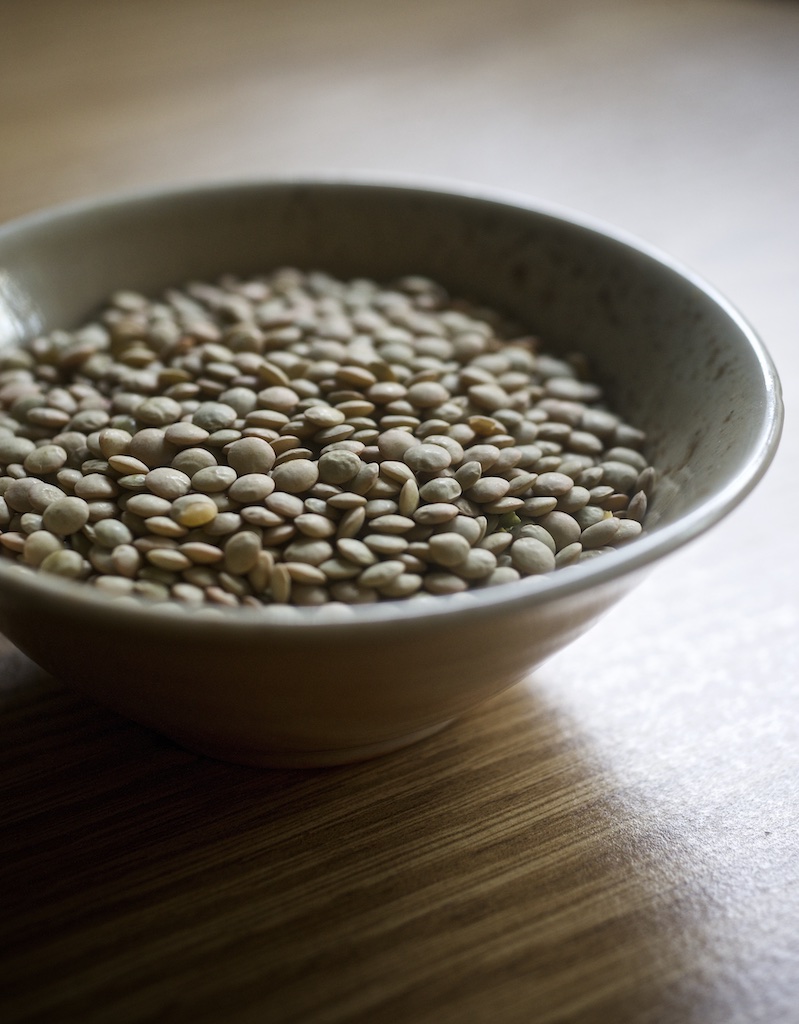
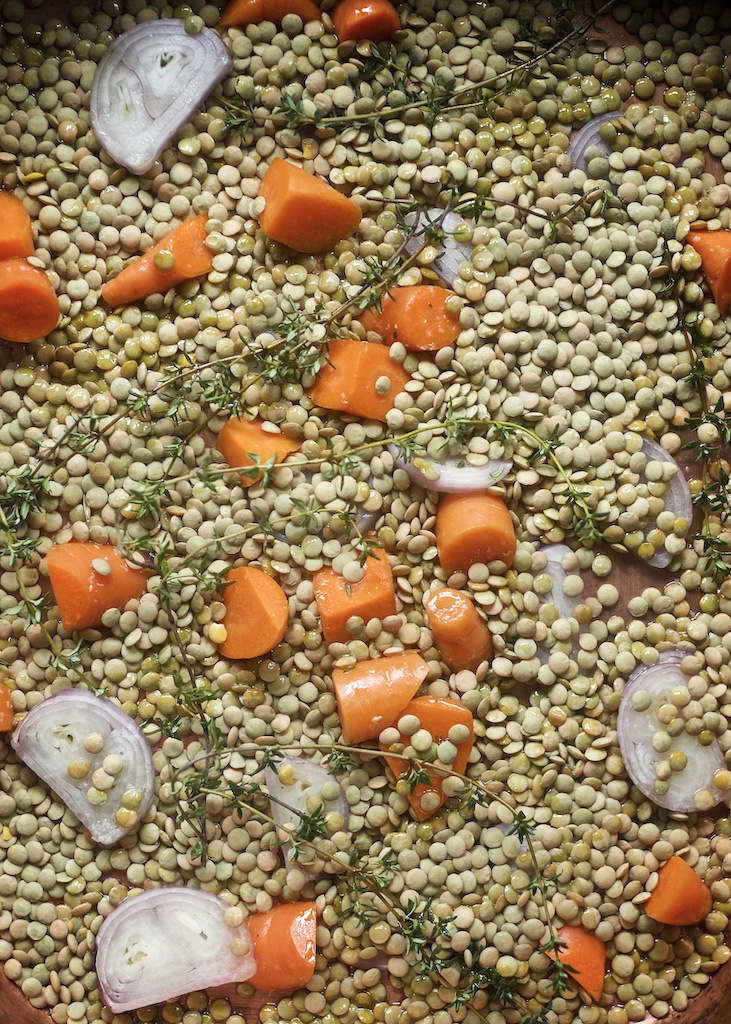
Preheat your oven to 400 degrees. In a metal or ceramic roasting dish, place the lentils, sliced shallot, carrot chunks, and fresh thyme. Drizzle liberally with olive oil, salt and pepper. Place in the oven and roast uncovered for about 25 minutes, stirring every 5-10 minutes.

STEP TWO:
 
While you are roasting the lentils, sauté the parsnips and kale on high heat. You want some color on the parsnips, but do not cook them all the way thru.
STEP THREE:
Remove the pan from the oven. Add roughly 1 cup of the wine and return to the oven, still uncovered. Cook for about 15 minutes or until the wine begins to reduce. Then add the water and cover with tin foil. Cook for about 40 minutes.


STEP FOUR:
Remove the tin foil, add the parsnips and kale and return the dish to the oven, cooking uncovered for another 20 minutes or until lentils are tender but not mushy. Add more water if necessary. Remove the thyme, season to taste with salt and pepper and serve.


Bon Appétit!


Photography, Text and Recipes by David L. Reamer. (@dlreamer)

A Healthy Start to the New Year: Making your own Kombucha

Homemade kombucha

In many ways, 2019 was a challenging year. (I think you know what I mean…) Well, we can’t control everything, but what we can do is look inward and start the new year with some healthy routines to keep the mind and body feeling great. The time for New Year’s resolutions is here again.

I can honestly say that just a few years ago I had never even heard of kombucha, but now it is a huge part of my diet and life. For the uninitiated, kombucha is simply a deliciously funky beverage made by fermenting sugar and tea with a SCOBY (Symbiotic Culture of Bacteria and Yeast). This process creates living probiotic bacteria that are wonderful for digestion and all around general health.

When I looked into making kombucha at home, I couldn’t believe how easy and inexpensive it was. I did several test runs and came up with a recipe that is delicious and consistent, but I encourage you to adjust the ingredients as you see fit for a sweeter, more sour or less carbonated finished product.
The first step in making kombucha is to make a healthy SCOBY. This will become the soul and backbone of your kombucha. (I named mine Scoby-Wan Kanobi.) This process is similar to the actual making of kombucha but must be done first. Here’s what you will need:

MAKING A STRONG SCOBY

A One Gallon Glass Jar
Cheesecloth or Paper Coffee Filters
4 C store bought unflavored kombucha*
2 T tea*
1/2 C regular granulated white sugar
1 Quart tap water

*For this, I recommend two local shops right across the street from each other on SE Belmont Street. First head over to the Soma Kombucha Taproom to pick up your unflavored kombucha. Feel free to bring your own Mason Jars. Then head across the street to The Tao of Tea to pick up the loose tea you need. I experimented with many teas but found the Malty Assan always seemed to work the best.

Homemade kombucha

Place the water, tea, and sugar in a large pot. Bring the water to a boil. Stir to dissolve all the sugar. Turn off the heat and let the tea steep for 15 minutes. Strain the liquid into the gallon jar. When cooled to room temperature, add the unflavored kombucha and cover with the cheesecloth or coffee filter- secured with a rubber band. Wait about 3-4 weeks and you should have a fully formed Scoby. I’m not gonna lie. Scobies are pretty gross, but they are firm and resilient to handling.

It is said they have a tendency to mold- at which point you would need to throw it away and start over- but I have been making kombucha for a year and have yet to encounter any mold. If you are worried, there are many visual examples you can find online.

Believe it or not, this is what a fully formed healthy Scoby looks like:

Homemade kombucha

Now that you have your Scoby, it’s time to make the Kombucha. It’s a very similar process using all the same ingredients, just with different proportions. In general, this first batch is too acidic to drink, but keep 2 C of the liquid for making your kombucha. (You will do this every time you set up a new batch.)

HOMEMADE KOMBUCHA RECIPE

12 C water
1 and 1/4 C granulated white sugar
1/4 C loose tea leaves
2 C of the liquid from your Scoby process

Just like before, place the water, tea, and sugar in a large pot. Bring the water to a boil. Stir to dissolve all the sugar. Turn off the heat and let the tea steep for 15 minutes. Strain the liquid into the gallon jar. When cooled to room temperature, add the unflavored kombucha and the Scoby and cover with the cheesecloth or coffee filter- secured with a rubber band.

Homemade kombucha

You can keep your kombucha at any temperature but remember that the colder it is, the longer the process takes. You can let the kombucha ferment anywhere from 1 week to a month. Since I keep mine at a colder temperature, I usually wait the full month before doing the second fermentation. This is done to add a specific flavor to the kombucha. There are myriad flavor choices for this step and I encourage you to try a few. For this project, I chose ginger and mint as my flavors.

*VERY IMPORTANT SIDE NOTE

When your kombucha is ready, you must put it into sealable bottles for the second flavoring fermentation. I STRONGLY recommend getting 6-8 Grolsch Beers. Drink the beers (duh!) and then use those bottles. I have had several bottles explode from the pressure built up during the second fermentation, but I have NEVER had a Grolsch bottle fail me.

Homemade kombucha

Whatever flavor you choose, pour your kombucha evenly among the bottles, leaving some room for the extra ingredients. Add the juice, ginger, herbs, etc. and then allow these to sit for about a week before drinking. It is perfectly acceptable to open the bottles every 2-3 days to let a little pressure off. This will not detract from the final effervescence.

One gallon usually makes about 6 Grolsch bottles worth.

Homemade kombucha

Homemade kombucha

I know that this was a practice in healthy starts, but let’s face it, we are a wine company, so we couldn’t end the post without coming up with a simple cocktail to show off your new creation. So here for your drinking pleasure, I present:

AFTERPARTY AT THE CO-OP

2 oz ginger mint kombucha
1.5 oz Underwood Pinot Gris
.5 oz Giffard Caribbean Pineapple Liqueur

Measure all ingredients into a shaker, fill with ice, shake heavily and strain into a glass. Enjoy!

Homemade kombucha cocktail

I hope this post will inspire you to try your own kombucha. It’s cheap, easy and fun for the whole family.

Happy New Year and keep those #pinkiesdown.

Photography, Text and Recipes by David L. Reamer.  (@dlreamer)

Pasta in the Pink: A Harms’ Family Classic Recipe

Union Wine Co Pasta in the Pink

We have been posting stories, recipes, cocktails and more all year long, but we had yet to focus on the Paterfamilias, Founder and Fearless Leader the Union Family… Ryan Harms. We asked Ryan how we could get him involved and he suggested sharing a classic family recipe that he makes often with his sons, Noah and Ethan. Ryan also personally cooks and serves this dish every year to his harvest crew.

In Ryan’s own words, “I worked at Al Forno in Providence, Rhode Island, during the summer of 1998. This is where I learned to make grilled pizza’s and this recipe comes from my experience there. Working there was transformational for me in getting a great base of cooking. They were doing farm to table before that was even a term. George and Joan created an amazing culture that continues on today.”

This particular recipe that Ryan adopted, ‘Shells Baked with Tomato, Cream and 5 Cheeses’ makes use of a basic but delicious tomato sauce base that was used in many of the Al Forno dishes. By adding a bounty of fresh cheeses and herbs, this simple pasta dish turns into something amazing. Its an easy recipe once you get the technique down, which we will happily guide you through…

Before any of the prep begins, preheat your oven to 500 degrees and get a large pot of salted water boiling for the pasta.

Union Wine Co Pasta in the Pink

Ryan specifically uses two different cans of tomatoes, one whole peeled and the other crushed. He begins by sautéing 4 cloves of garlic in a pan, and just as they start to brown, he adds a 1/2 C of chicken stock and a 1/2 C of Kings Ridge Pinot Gris.

Union Wine Co Pasta in the Pink

As this cooks, Ryan’s son Noah opens the two cans of tomatoes into a large bowl, adds the garlic and liquid (once it has come to room temperature) and gently mashes it all together.

Union Wine Co Pasta in the Pink

Union Wine Co Pasta in the Pink

Union Wine Co Pasta in the PInk

Union Wine Co Pasta in the Pink

Once the sauce is well blended, Ryan adds the following cheeses:

¾ c freshly grated Pecorino Romano
¾ c coarsely shredded fontina
4 tbsp. crumbled gorgonzola
2 tbsp fresh ricotta

Keep this separate to top the dishes before baking:
2 small (4 oz. total) balls of fresh mozzarella, sliced

Union Wine Co Pasta in the Pink

Then Ryan’s younger son, Ethan steps in and mixes all the cheeses as well as 2 C of heavy cream into the sauce, giving it a distinctive pink hue.

Union Wine Co Pasta in the Pink

As this is being done, Ryan chops:

1 small bunch of italian parsley
2 sprigs of fresh rosemary
8-10 springs of fresh thyme

This gets mixed into the sauce.

Union Wine Co Pasta in the Pink

He also chops 4 scallions on a hard bias (diagonal cut) and places in ice water to keep from wilting. This will be the final garnish on the pasta.

Union Wine Co Pasta in the Pink

Once all the prep is done, Ryan adds 1 pound of pasta shells to the boiling water and par cooks for five minutes. Immediately strain and add all the pasta to the sauce.

Union Wine Co Pasta in the Pink

Union Wine Co Pasta in the PInk

Union Wine Co Pasta in the Pink

Ryan then mixes the shells until fully coated in the sauce and cheese mix. Then he scoops into a large baking dish or several small ceramic dishes for individual servings. He tops each one with a thick slice of fresh mozzarella cheese and a few small dabs of butter. Bake for 10 minutes or until the pasta starts to crisp on top.

Remove the pasta, allow to sit for 5 minutes, garnish with the fresh scallions and dig in!

Union Wine Co Pasta in the Pink

The finished product is nothing short of amazing!

Union Wine Co Pasta in the Pink

Everyone in the Harms family: Kathleen, baby Mia, Noah, Ryan and Ethan wish you a hearty Bon Appétit!

Union Wine Co Pasta in the Pink

Photography and Text by David L. Reamer. (@dlreamer)

Recipe by Ryan Harms (@harmsryan)

New Approaches to your Thanksgiving Leftovers

Union Wine Co Thanksgiving Leftovers
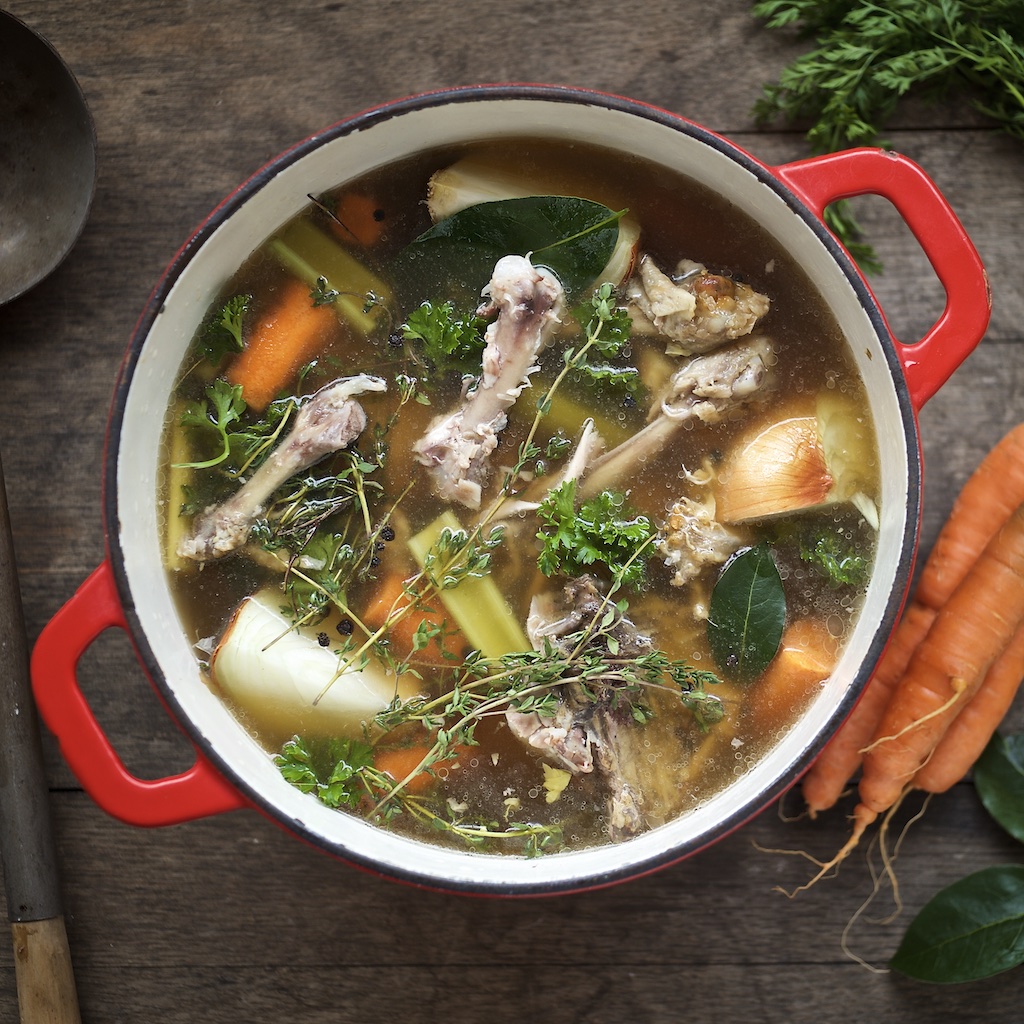
For we Epicureans, Thanksgiving is an absolutely wonderful time not just to celebrate the traditions of family but also the traditions of food. Much evolved from what the holiday used to celebrate, these days Thanksgiving gives us the opportunity to reunite with old friends or family that live far away and recreate the dishes we remember from youth. Ask anyone who regularly hosts a Thanksgiving dinner and they can list the exact dishes that need to be seen on the table to make the day complete.

But so much food oftentimes leads to lots and lots of leftovers, especially turkey. And sure, who doesn’t love a good open-faced sandwich with all the usual suspects: turkey, stuffing, mashed potatoes, gravy and maybe even a little cranberry sauce for zing. This year, we thought we would offer a few more healthy ways to use up all that extra bird and stuffing… especially if your houseguests are staying for a few days. These recipes compliment each other well, allowing for a lighter follow up to the Turkey Day overload. It also offers a great way to finish off those half-full bottles of wine!

Our very first recommendation is to make a turkey broth. It takes almost no effort (and will come in very handy in one of our following recipes…) To save room in an already crowded fridge, most people pick all the remaining meat off of their turkey anyway, so that puts you almost halfway to prepping the broth. Just make sure to save that turkey carcass!

Turkey Broth

Turkey carcass including leg bones
2 large carrots
1 large onion
2 small stalks of celery
TBS black peppercorns
2 bay leaves
4 sprigs of thyme
4 sprigs of parsley
small pinch of salt

Peel and chop all vegetables. Put all ingredients in a pot and cover with cold water. Bring to a boil, skimming off any fat that rises to the surface. Reduce to a very low simmer and cook for 2 to 3 hours. Let cool slightly and then strain.

And voila! You have just made a delicious turkey broth. This will come in very handy for our first alternative take on leftovers: turkey, wild rice and vegetable soup.

Union Wine Co Thanksgiving Leftovers

Turkey, wild rice and vegetable soup

2 quarts turkey broth
1/2 C uncooked wild rice
2 C shredded turkey meat
8 crimini mushrooms
1 large carrot
3 celery stalks
1 small red bell pepper
Italian parsley for garnish

Place rice in a pot with 3 cups cold water and a pinch of salt. Bring to a boil and then reduce to a simmer until rice is fully cooked. Strain off extra water and set rice aside to cool.

Slice all vegetables and sauté in a large soup pot for 5 minutes, or just until they start to soften. Add shredded turkey and turkey broth to the vegetables. Simmer for 20 minutes and adjust seasoning. Add wild rice just before serving. Garnish with pieces of parsley.

**********************

Our next recipe is a take on a classic Waldorf salad, with a few small changes including celery root and a delicious yogurt honey-lime dressing.

Union Wine Co Thanksgiving Leftovers

Turkey Waldorf Salad

2 C shredded turkey meat
1 large celery root
4 stalks of celery with inner leaves
2 C cooked walnuts
2 C red grapes
2 Honey Crisp apples

Dressing:

1 C whole milk greek yogurt
2 TBS mayonnaise
1 lime- juiced
2 TBS honey
pinch of salt

First, make the dressing by whisking all ingredients together in a small bowl. Adjust for seasoning and sweetness.

Peel the celery root and cut into matchsticks. Toss with half the dressing and set aside. Slice the grapes, apples, and celery. Add these as well as the walnuts and shredded turkey to the celery root. Mix well, adding more dressing if necessary. Garnish with celery leaves.

This salad works great with our Underwood Pinot Noir!

************************

The third act in our trio of recipes uses not only leftover turkey but some of the stuffing and cranberry sauce as well.

Union Wine Co Thanksgiving Leftovers

I absolutely love a good quiche, especially when paired with a crisp glass of our Underwood Pinot Gris. But for me, the crust is the most important part. There are very decent pre-made crusts you can buy at the supermarket these days, but a homemade crust is just soooo good and much easier to make than you’d think.

Quiche Dough

3 C all-purpose flour
1/2 teaspoon baking powder
pinch of salt
3/4 C cold butter
1/2 C shortening
3 TBS water

Cut butter into very small pieces. Put all dry ingredients into a mixer to combine. Slowly feed in the butter chunks and shortening until mixed well. Slowly add water until the dough is fully combined but not too wet.

Separate into 2 disks, wrap in plastic and let sit in the fridge for at least 1 hour. When ready, roll out as demonstrated here…

Union Wine Co Thanksgiving Leftovers

Union Wine Co Thanksgiving Leftovers

Thanksgiving Quiche

1 C shredded turkey
1 C leftover stuffing
1/2 C shredded cheddar cheese
5 whole eggs
1/2 C of half and half
salt and pepper
cranberry sauce

Whether using a store bought crust or a homemade one, you first want to pre bake the crust in the dish. Set the oven at 375 degrees, roll dough evenly in the pan and bake for 10-15 minutes until it just starts to color. Remove from the oven.

Whisk the eggs and half and half together. Season this mix with salt and pepper. Evenly distribute the turkey, stuffing, and cheese in the pie shell. Pour egg mixture slowly over the top. Return to the oven and cook until the egg is set, usually about 20-25 minutes. Allow to cool slightly before cutting and serving.

Garnish with cranberry sauce.

Union Wine Co Thanksgiving Leftovers

We hope you had a successful and delicious holiday! From everyone here in the Union Family, we wish your family a Happy Thanksgiving, and remember to keep those pinkies down!

Bon Appétit!

Photography, Text and Recipe by David L. Reamer.  (@dlreamer)

Union Wine Co. Kitchen Skills: Mastering Boeuf Bourguignon

Classic Beef Bourguignon

The one and only Julia Child was often quoted as saying her favorite dish of all time was Boeuf Bourguignon, and who amongst us can refute the opinion of the iconic, influential, (and most likely) original celebrity chef? Ms. Child’s lessons embraced not just classic french dishes, opening up a whole new world to 1960s America, but instead of lots of “Bams!” and British beratings, Ms. Child chose to teach with wit, charm, skill and, of course, a full glass of wine.

I bring this all up because a cursory google search of Boeuf Bourguignon will bring you countless postings of her classic recipe, known worldwide from her book Mastering The Art of French Cooking. And don’t get me wrong, it’s a solid recipe. But ever the iconoclast, I am going to present you with my own take on the French classic. With a little preparation and time management, I promise you will be serving your guests a Boeuf Bourguignon that will knock their socks off!

As winter approaches, soups, stews, and braises become the prevalent choice for warm and delicious evening meals, so without further ado, let’s get to braising.

STEP ONE:

It’s important to get the right ingredients before you begin. Of utmost importance is a nice quality piece of Beef Chuck with good marbling (lines of fat running through the meat, making it not too lean but not to fatty—your butcher can help with this.) Second is to get a high-quality Beef Stock. I recommend “Stock Options” brand. It has a very low salt content and a good amount of gelatin that you will not find in other beef broths.

To get started, you will need:

3 lb well-marbled beef chuck
1 large carrot, peeled
1 celery stick
1-2 small yellow onions, skins left on
2 cloves garlic, peeled
2 bay leaves
a small bunch fresh thyme—tied with twine
2 tablespoons tomato paste
1 slice bacon, 1/2” thick
salt and pepper
olive oil

One full bottle of Underwood Pinot Noir
28 oz Stock Options Beef Stock

Classic Beef Bourguignon

Classic Beef Bourguignon

STEP TWO:

Carefully cut the beef into several large, evenly-sized chunks. Season liberally with salt and pepper.

Classic Beef Bourguignon

STEP THREE:

Preheat oven to 325 degrees.

In a cold, high-sided, thick-bottomed pot, add 2 TBS of olive oil and the bacon. Starting with a cold pan and cooking on medium heat will ensure the bacon can render its fat without burning. Once the bacon has a nice color, remove from the pan, increase heat and when the pot is just about smoking, add half the pieces of beef. Sear well on each side. Repeat with the rest of the meat. Set aside.

Classic Beef Bourguignon

STEP FOUR:

In the same pan, place the onion halves, cut side down, the carrots, celery, and garlic and sauté without burning until the color is developed. Set aside. (I keep the pieces fairly large, as they will be removed once the meat is fully cooked.) While the pan is still hot, carefully pour the full bottle of Pinot Noir into the hot pan. Scrape up any of the delicious brown bits (called frond) from the bottom of the pan, as this will add immense flavor to your sauce.

Classic Beef Bourguignon

Once the wine boils, add the beef stock and tomato paste. While this is coming to a boil, arrange all ingredients into a baking dish, making sure not to crowd the meat. Pour the hot liquid into the pan. The liquid should just about cover all the ingredients.

Classic Beef Bourguignon

STEP FIVE:

Cut a piece of parchment paper to loosely cover the baking dish. Some recipes will tell you to cover tightly with tin foil, but I prefer to leave some breathing room to color the meat and help reduce the sauce.

Bake for about 2 1/2 hours. About halfway through, gently flip all the pieces of meat in the pan, re-cover and return to the oven.

Classic Beef Bourguignon

STEP SIX:

Once the meat is tender to the touch, remove the pan from the oven and let sit for 20 minutes until cool enough to handle. At this point, very gently remove each piece of meat to a large Tupperware container and strain the sauce over the meat, removing all vegetables, herbs, etc. Those can be composted.

I try to do all of this a day before eating so that the cooked meat can sit in the sauce overnight. If not serving immediately, it is important to keep the cooked meat covered in sauce, or the meat will dry out.

STEP SEVEN:

When you are ready to serve, sauté peeled Cipollini onions for 5 minutes. Remove from the pan and sauté whole Cremini mushrooms for 5 minutes. Place meat, sauce, onions, and mushrooms in a new braising dish and place in a 350-degree oven, uncovered, for about 25 minutes until everything is hot and the sauce has reduced slightly.

Serve over your choice of mashed potatoes, roasted potatoes or egg noodles.

Classic Beef Bourguignon

Classic Beef Bourguignon

Since we began with Julia Child, I feel it is only fitting to finish this post quoting the ending of her final book, My Life In France:

“…thinking back on it now reminds that the pleasures of the table, and of life, are infinite –
toujours bon appétit!”

Photography, Text and Recipe by David L. Reamer.  (@dlreamer)