Posts Tagged: canned wine

Take your Super Bowl Snacks to the Next Level

Underwood Wine Super Bowl

This Sunday, whether you will be rooting for that dreamboat Jimmy G. and his 49ers, or the insanely talented Patrick Mahomes and the Chiefs, I think we can all agree on a few things; One, let’s just hope its a close game. Two, at least we don’t have to watch the Patriots again. And three, whoever is in charge of snacks better not disappoint.

For those Super Bowl party-goers who are more interested in the commercials and the J-Lo halftime performance (you know who you are), the afternoon’s snacks become that much more crucial. So, we figured we’d suggest a few classic treats made in a new way that are bound to impress your guests and make you the hit of the party.

Underwood Wine Jello Shots

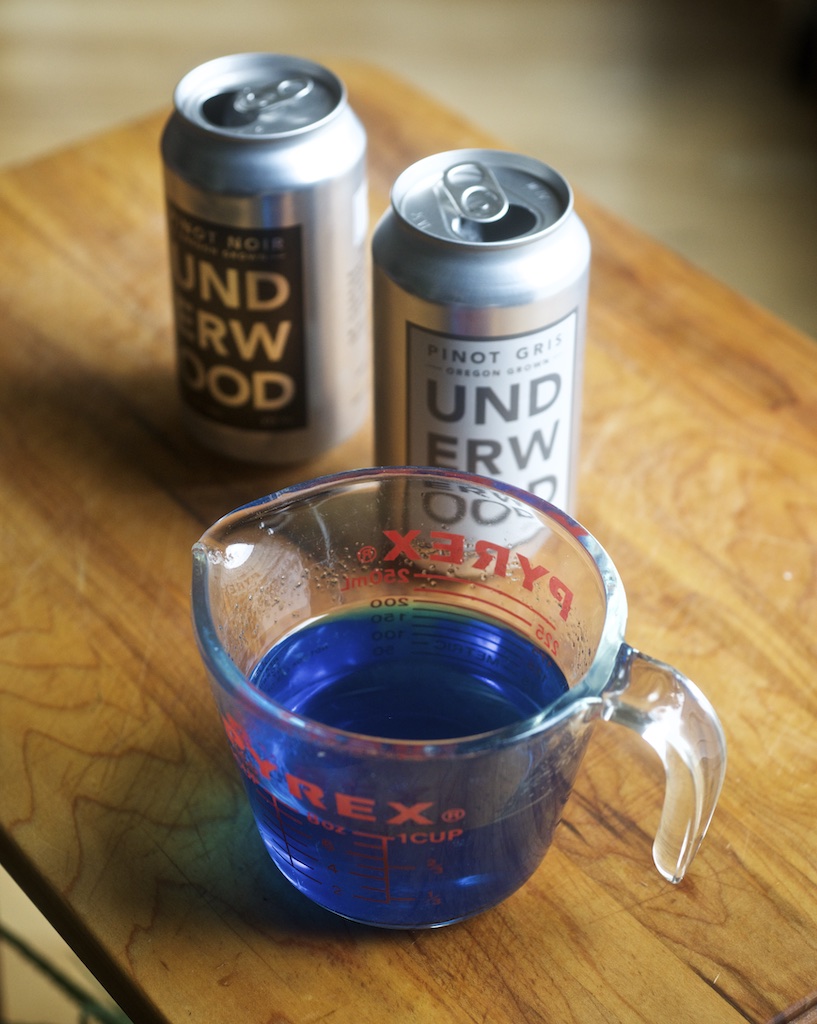
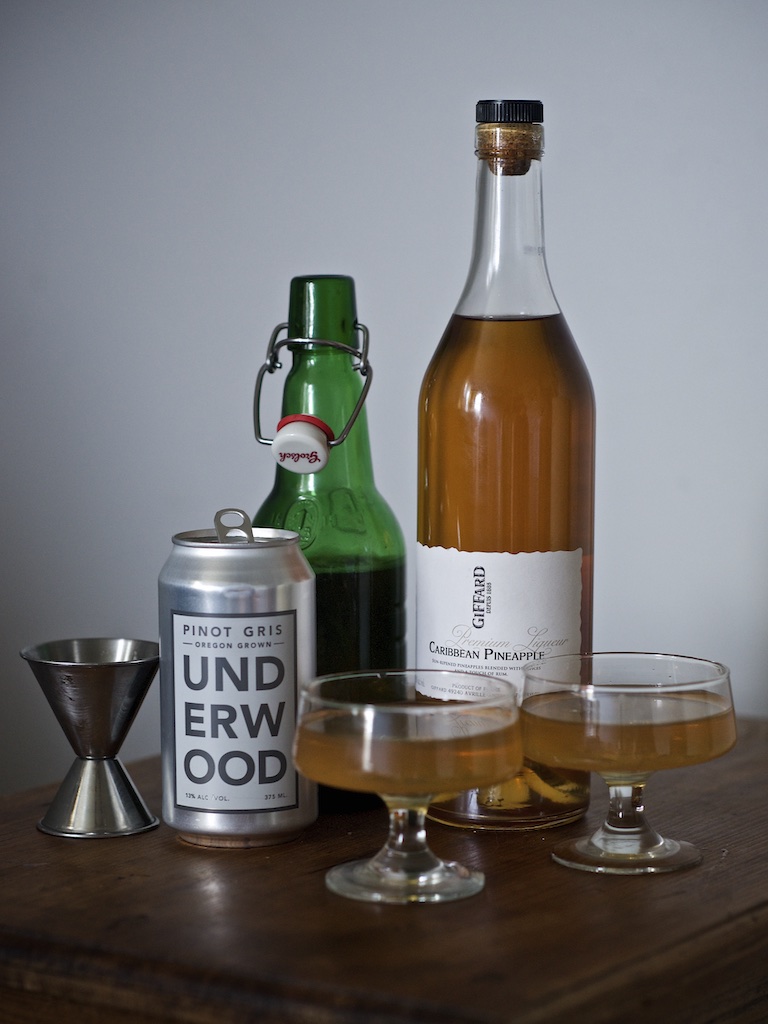
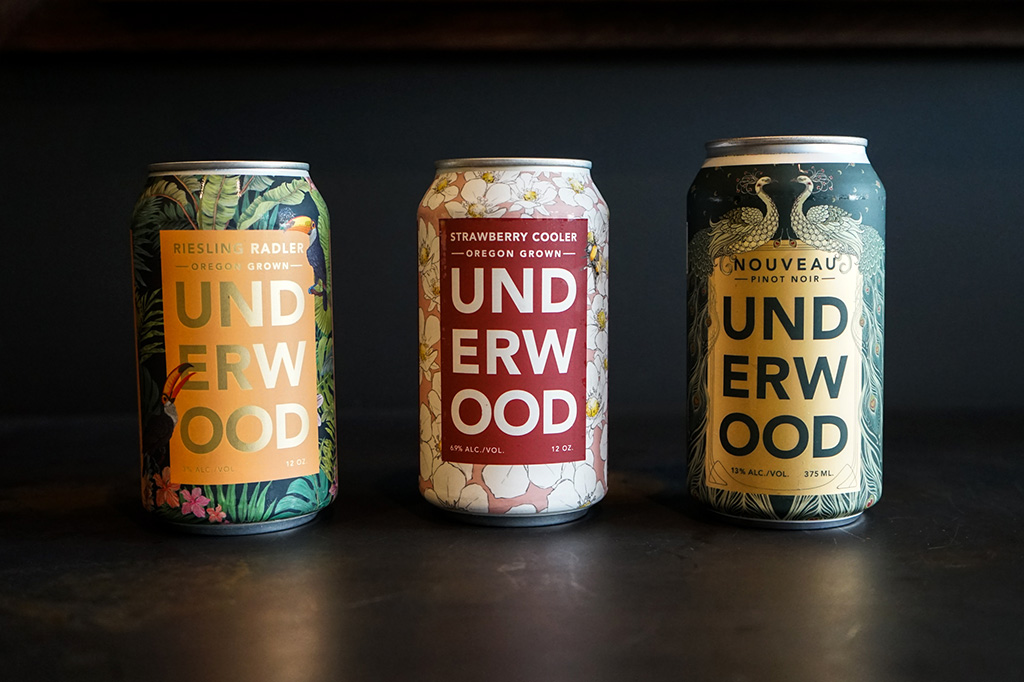
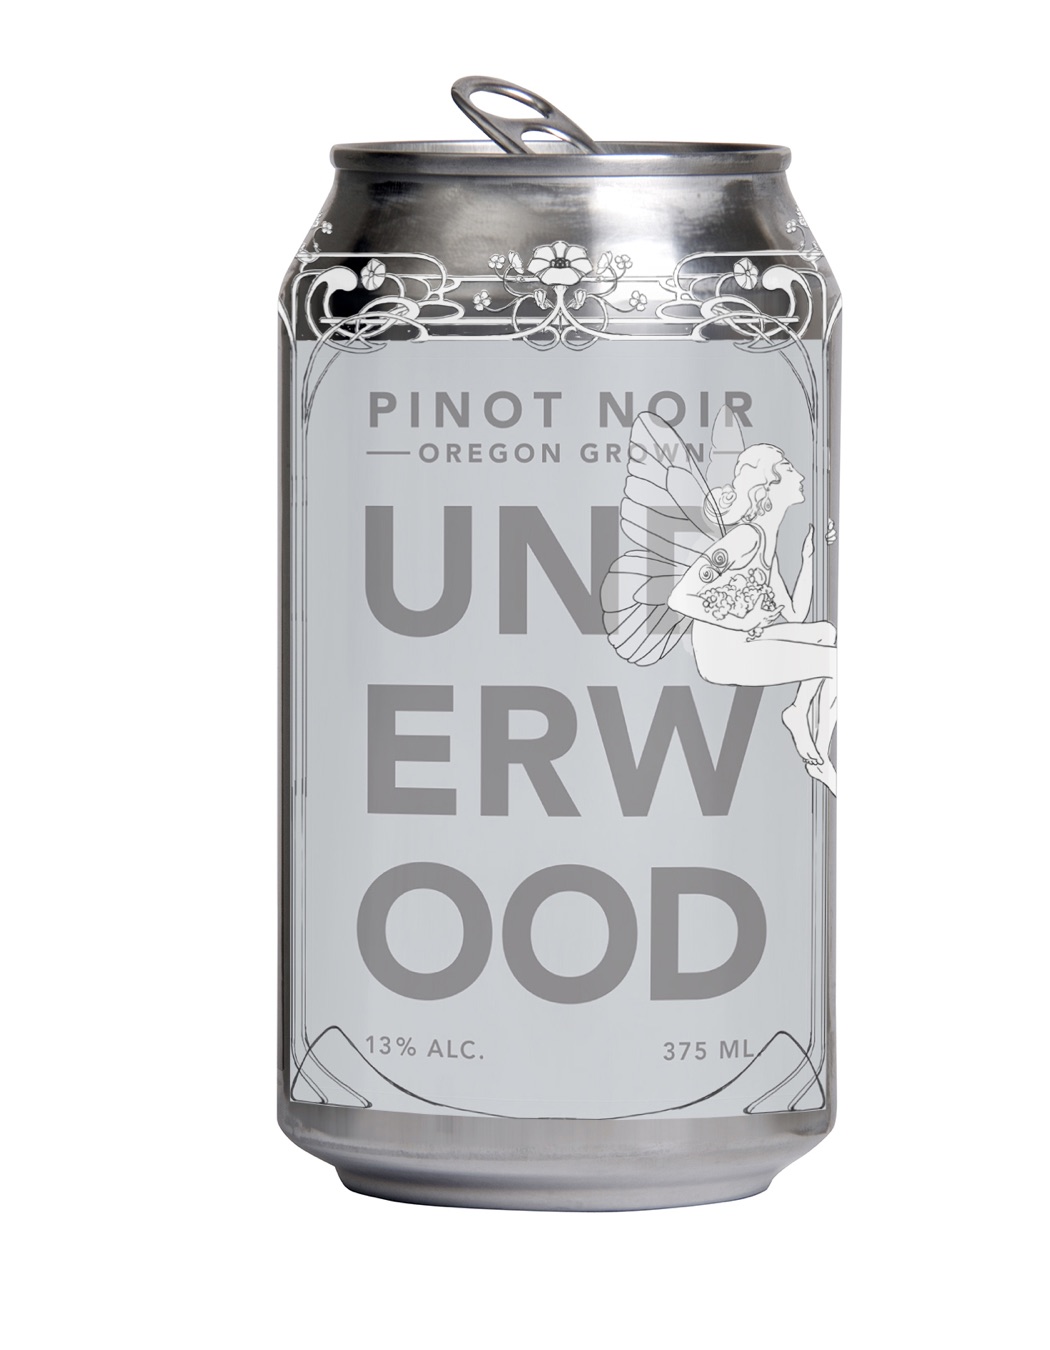
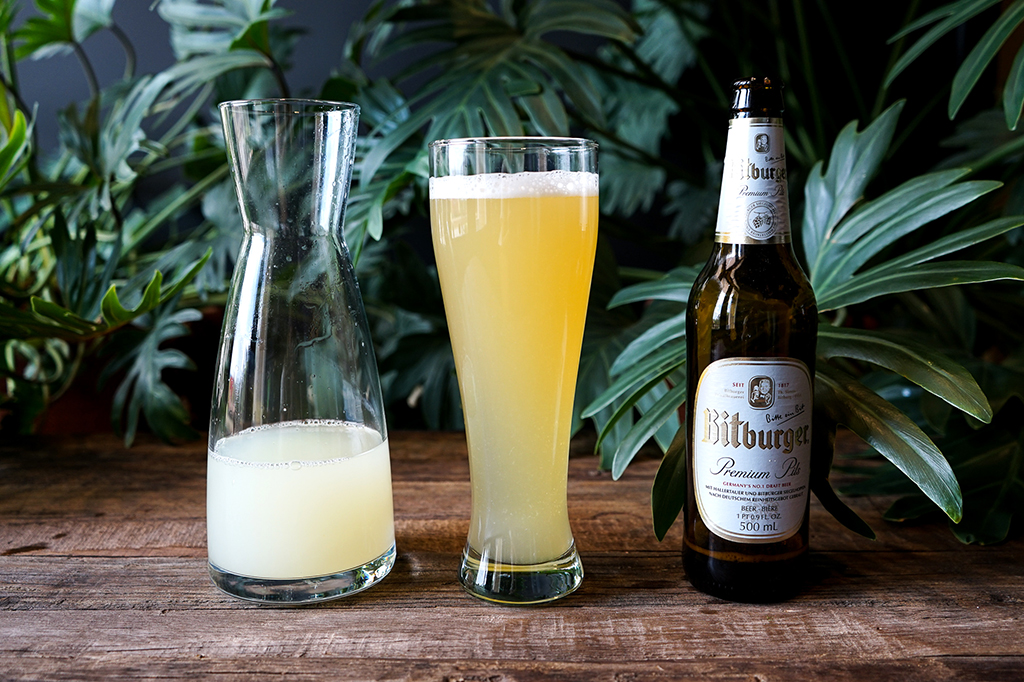
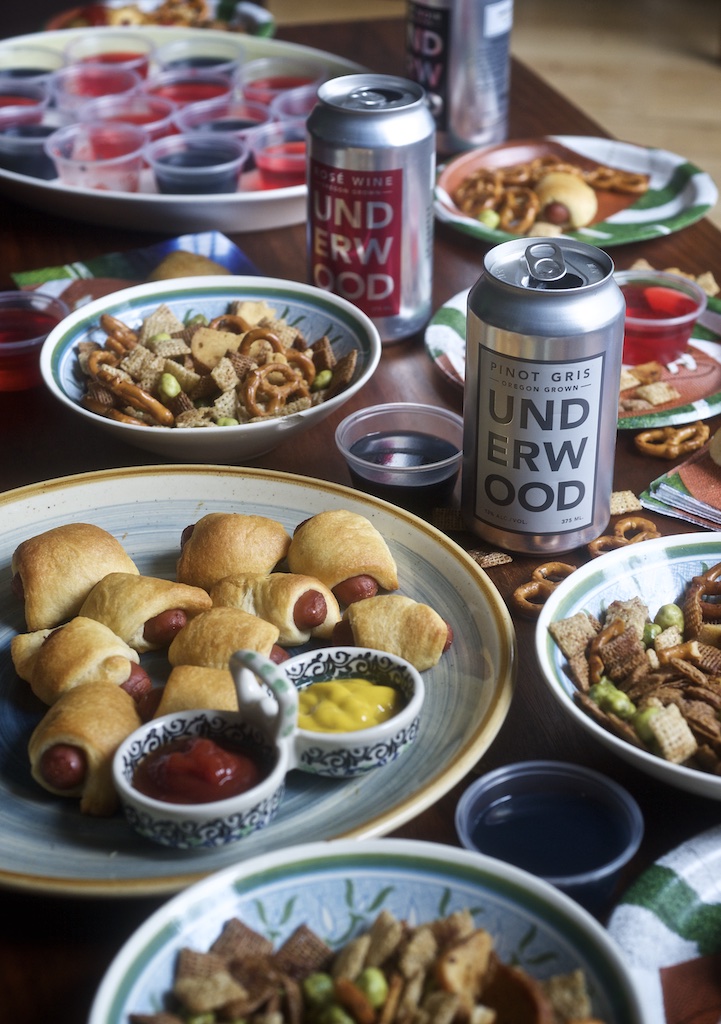
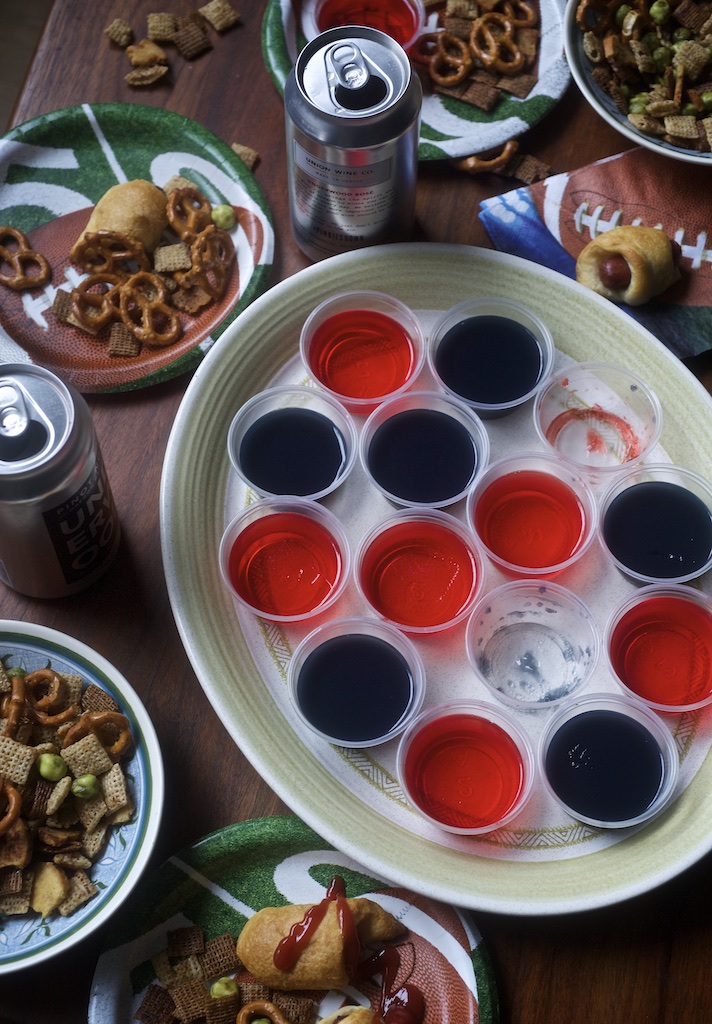
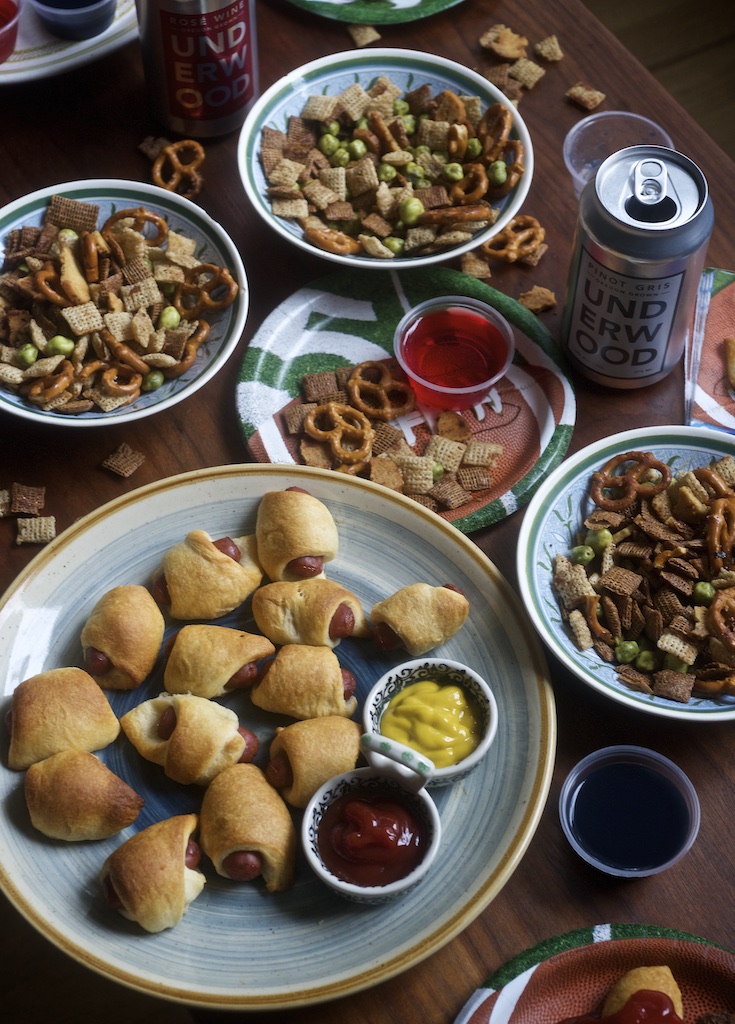
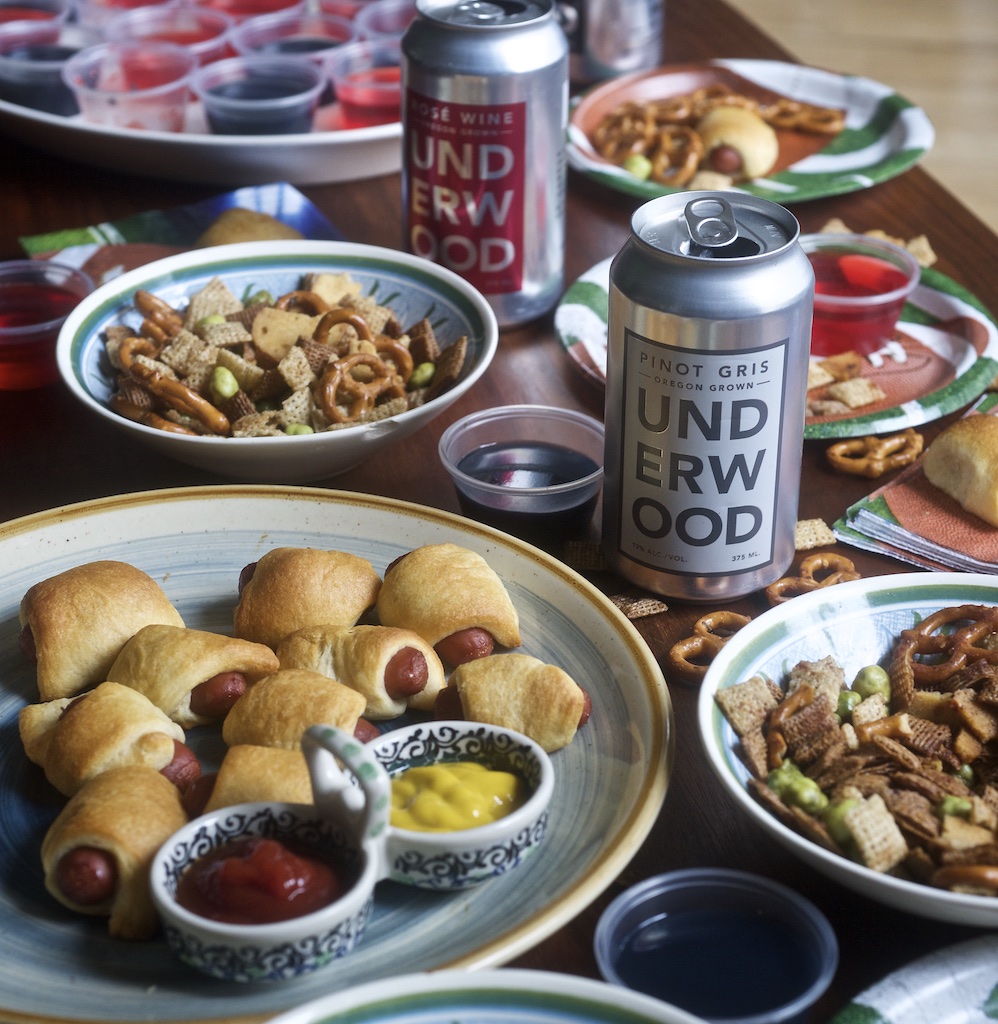
First off, we thought we would show you our take on the classic Jello Shot. There are few constants in this crazy and unpredictable world of ours, but I think it’s safe to say that everyone loves Jello Shots. The original ones, made with vodka or grain alcohol, can really sneak up on you and pack quite the punch. So, we decided to mellow it out a bit and make two flavors using our Underwood Pinot Gris and Pinot Noir. We had planned on matching team colors, but since it’s going to be red all the way around, we went a little off-script. (Thanks a lot, Aaron Rodgers!)

Blue Raspberry Pinot Noir Jello Shots

You don’t need to be a culinary wizard to pull off Jello, that’s a big part of the allure. Simply combine one package of Blue Raspberry Jello with 1 Cup of boiling water. Whisk to combine. Let cool slightly and add 1 C Pinot Noir. Separate into small cups. Makes about 15.

Strawberry Pinot Gris Jello Shots

Repeat the same steps as above, just use the Strawberry Jello and 1 Cup of boiling water with 1 Cup of Pinot Gris. Both of these turned out delicious and hopefully won’t be quite as strong as the ones you may have had back in your college days. (We all have to get up early on Monday for work.)

Underwood Wine Jello Shots

Underwood Wine Jello Shots

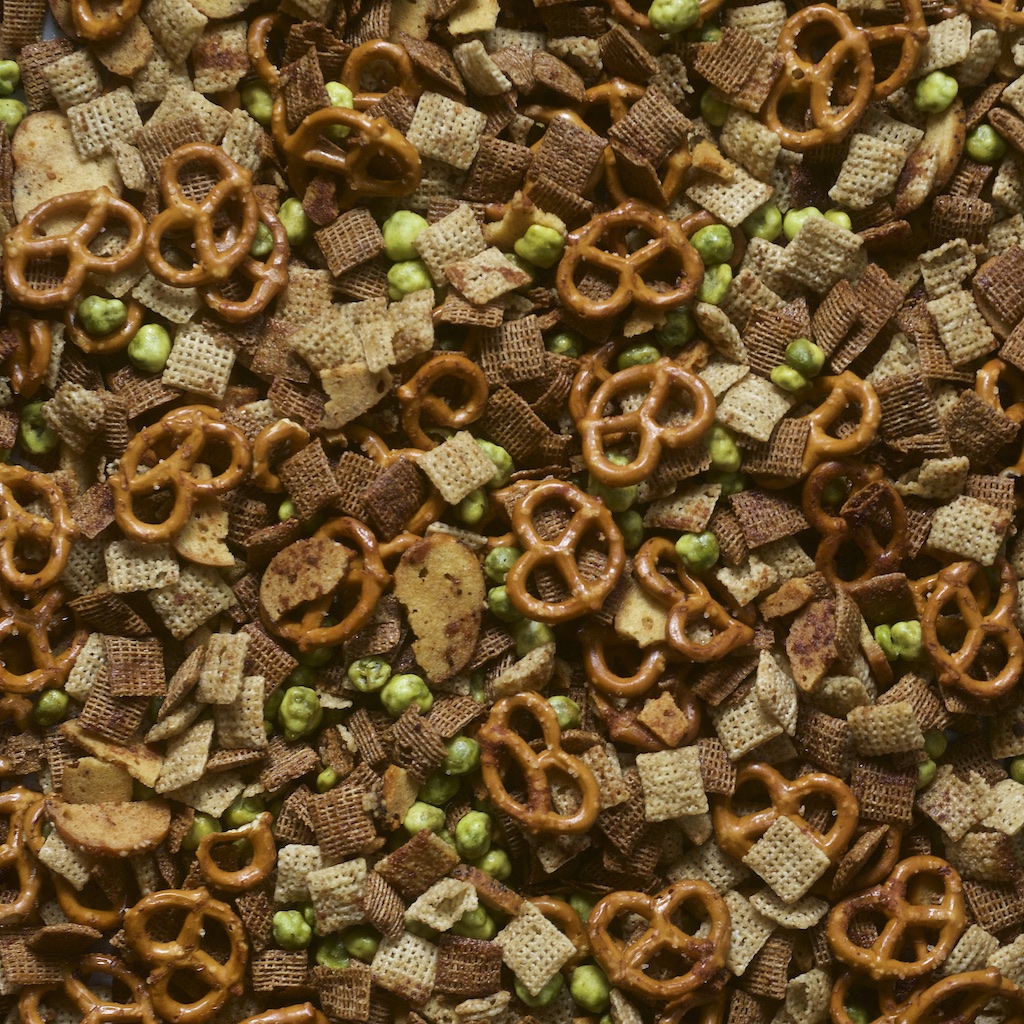
Another game day favorite is Chex Mix. There are lots of different variations on the classic baked mix and we encourage you to add any ingredients that strike your fancy. We recently discovered the Jacobsen Ramen Seasoning and thought we would try something a bit cross-cultural. The wasabi peas really add an amazing and unexpected kick.

Underwood Wine Super Bowl Snacks

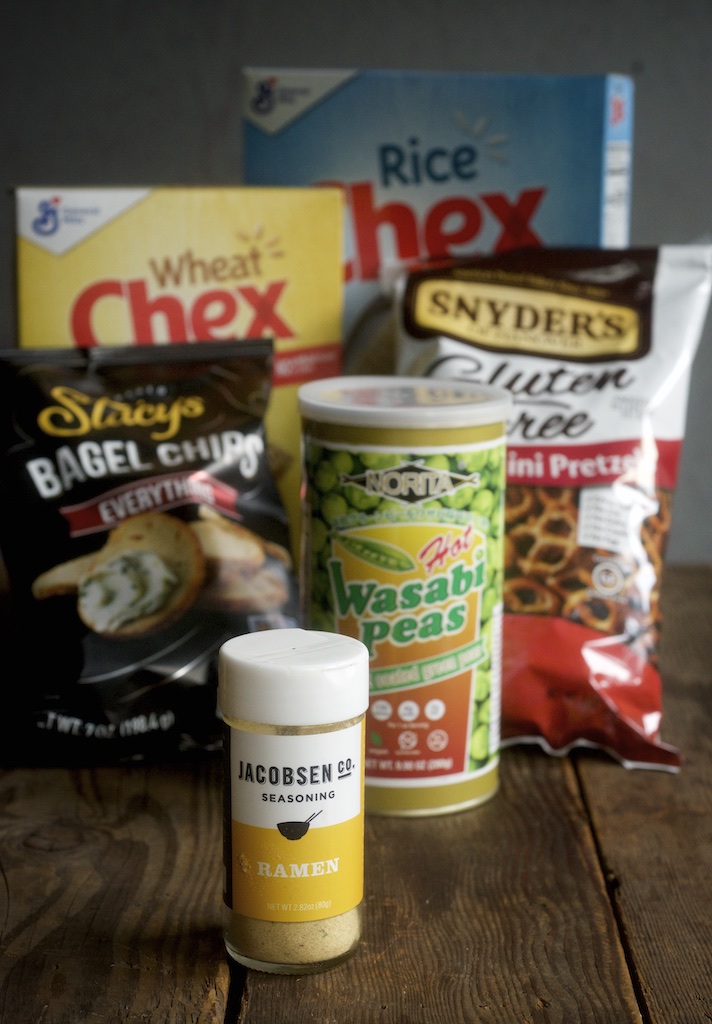
Japanese Ramen Chex Mix

2 C Rice Chex
2 C Wheat Chex
1 1/2 C baby pretzels
1 1/12 C bagel chips (broken into smaller pieces)
1 C Wasabi Peas
1 1/2 sticks unsalted butter
1 (heaping) T Jacobsen’s Ramen Seasoning
1 T Worcestershire Sauce
1 t onion powder
1 t garlic powder

Preheat the oven to 250 degrees. Spread the first 4 ingredients equally among two half-sheet pans. (Don’t add the wasabi peas until after cooking is complete.)
On the stovetop, melt butter and whisk in remaining ingredients. Evenly coat all dried ingredients and cook for one hour, removing the pans every 15 minutes to stir for even cooking. Once cooled, stir in the peas and store in glass Mason jars.

Underwood Wine Chex Mix

Underwood Wine Chex Mix

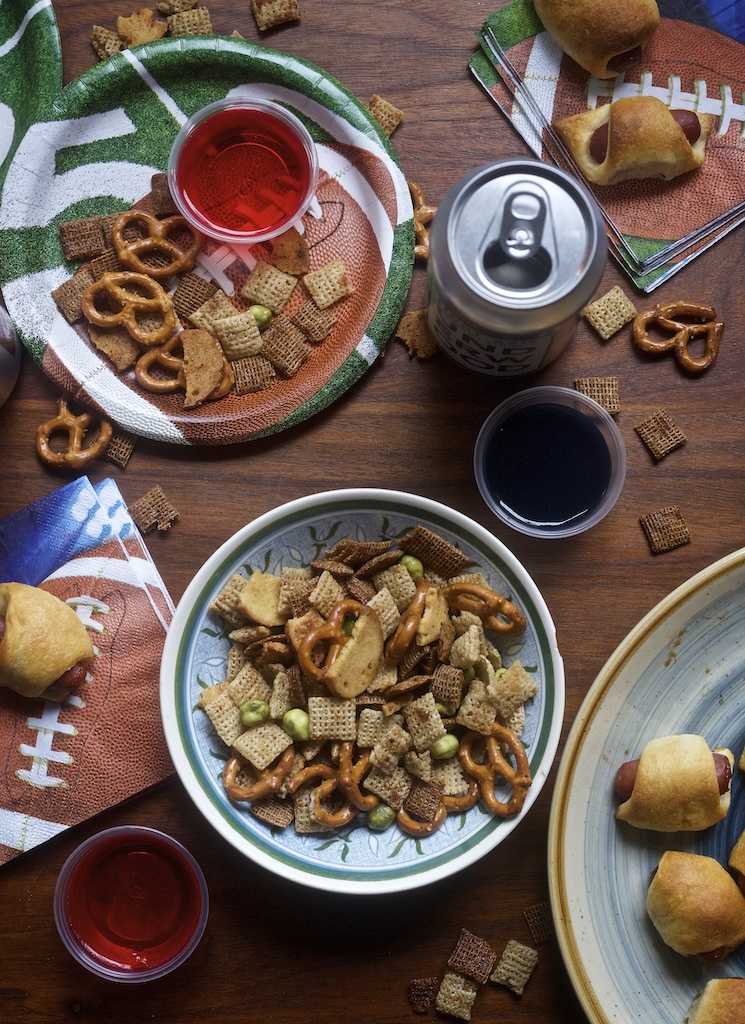
For our final recommendation, we wanted to stick with a tried and true classic—Pigs in a Blanket. We recently tried some pre-made, store-bought ones and they were terrible and crazy expensive. There is no substitute for making them from scratch, and it is so easy, there is no excuse not to.

Underwood Wine Super Bowl Snacks

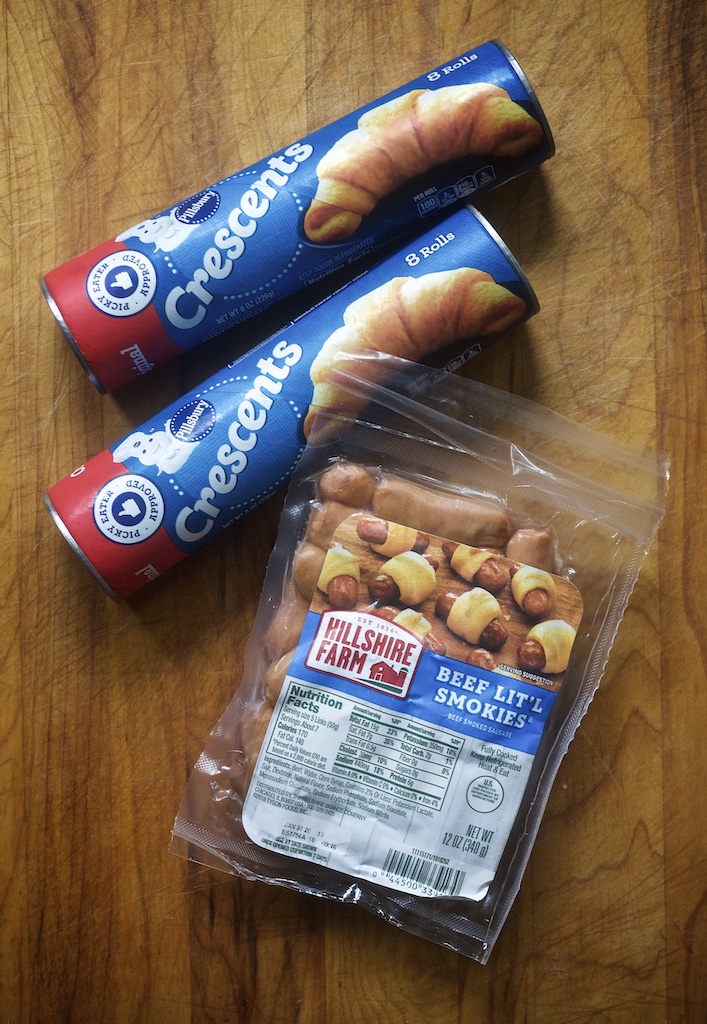
Literally the hardest part of this is how Pillsbury makes you open the rolls with the back of a spoon. It’s so weird, but it works, so I guess you can’t argue with success.

Take the Lit’l Smokies out of their packaging, rinse them well, dry them off and set them aside. Then open the crescent rolls. There will be 4 separate squares and each square is divided into 2 triangles. Cut each triangle into 3 smaller triangles. Place a Lit’l Smokey on each triangle, and roll it up. Place these evenly spaced on an ungreased cookie sheet and keep refrigerated until ready to cook.

Preheat the oven to 375 degrees and cook for about 12 minutes, rotating the pan halfway thru to ensure even cooking. Remove any that are getting too brown. Then just squeeze out some ketchup and mustard for dipping and you will be good to go!

Underwood Wine Super Bowl Snacks

Whoever you end up rooting for, everyone here at Union wishes you a safe and exciting Super Bowl Sunday!

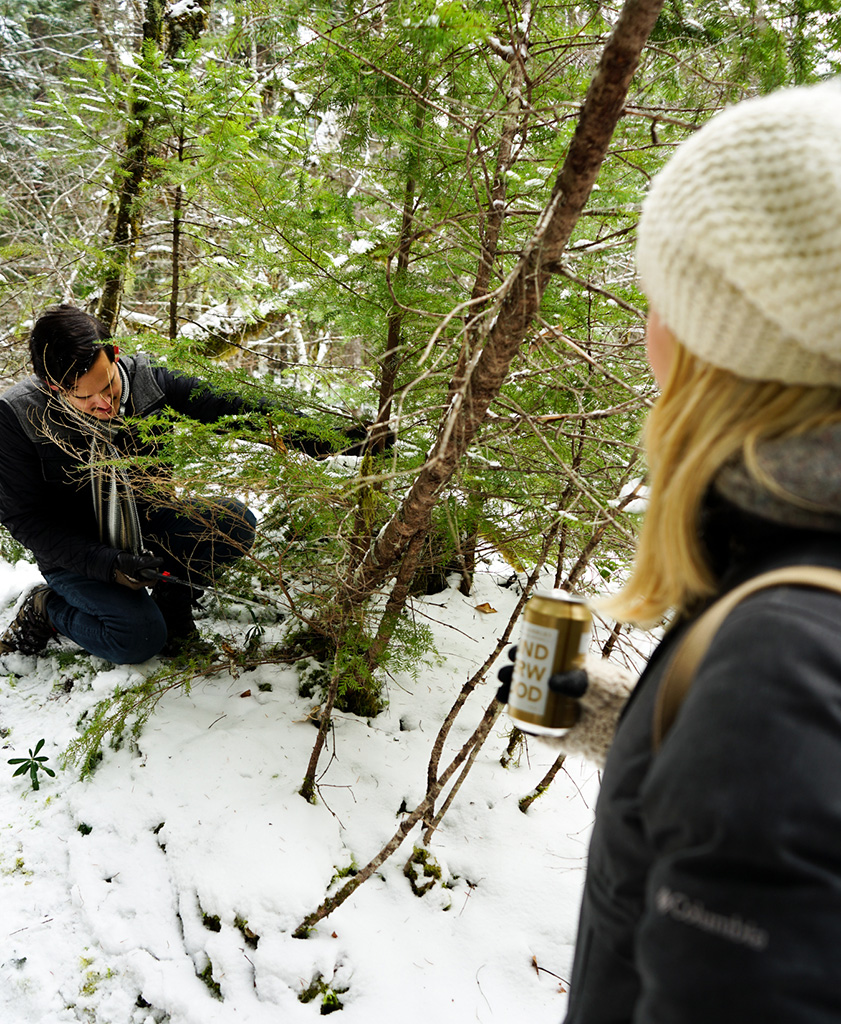
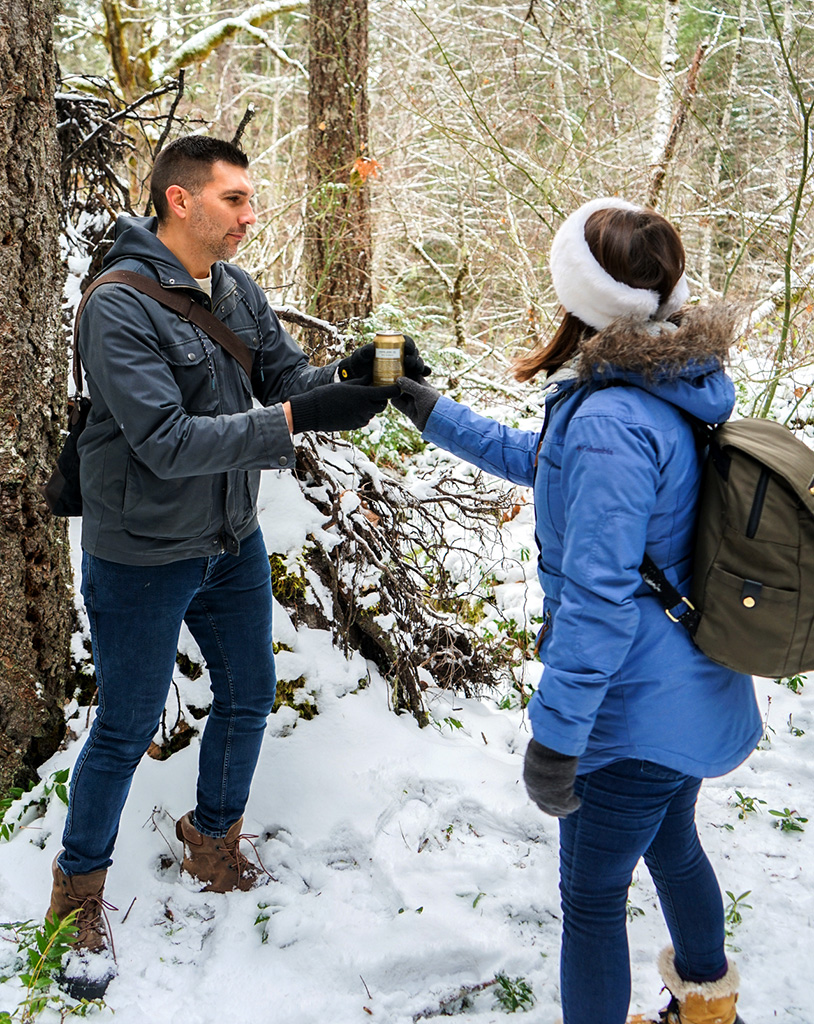
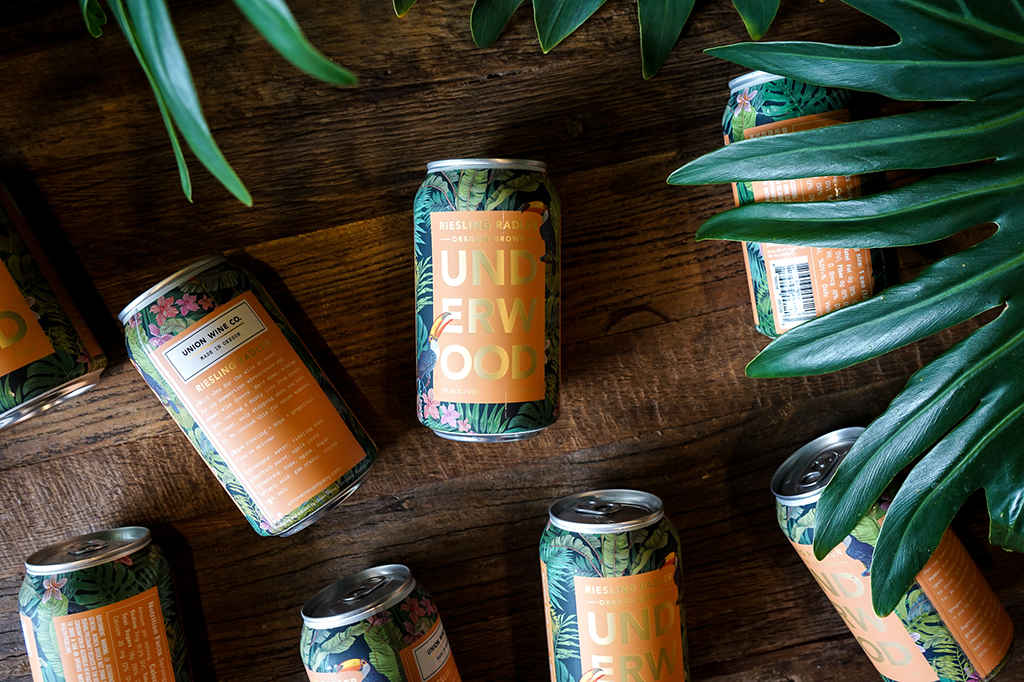
Bon Appétit! And make sure you have plenty of Underwood Cans on hand for all your guests.

Underwood Wine Super Bowl Snacks

Photography, Text, and Recipes by David L. Reamer. (@dlreamer)

A Healthy Start to the New Year: Making your own Kombucha

Homemade kombucha

In many ways, 2019 was a challenging year. (I think you know what I mean…) Well, we can’t control everything, but what we can do is look inward and start the new year with some healthy routines to keep the mind and body feeling great. The time for New Year’s resolutions is here again.

I can honestly say that just a few years ago I had never even heard of kombucha, but now it is a huge part of my diet and life. For the uninitiated, kombucha is simply a deliciously funky beverage made by fermenting sugar and tea with a SCOBY (Symbiotic Culture of Bacteria and Yeast). This process creates living probiotic bacteria that are wonderful for digestion and all around general health.

When I looked into making kombucha at home, I couldn’t believe how easy and inexpensive it was. I did several test runs and came up with a recipe that is delicious and consistent, but I encourage you to adjust the ingredients as you see fit for a sweeter, more sour or less carbonated finished product.
The first step in making kombucha is to make a healthy SCOBY. This will become the soul and backbone of your kombucha. (I named mine Scoby-Wan Kanobi.) This process is similar to the actual making of kombucha but must be done first. Here’s what you will need:

MAKING A STRONG SCOBY

A One Gallon Glass Jar
Cheesecloth or Paper Coffee Filters
4 C store bought unflavored kombucha*
2 T tea*
1/2 C regular granulated white sugar
1 Quart tap water

*For this, I recommend two local shops right across the street from each other on SE Belmont Street. First head over to the Soma Kombucha Taproom to pick up your unflavored kombucha. Feel free to bring your own Mason Jars. Then head across the street to The Tao of Tea to pick up the loose tea you need. I experimented with many teas but found the Malty Assan always seemed to work the best.

Homemade kombucha

Place the water, tea, and sugar in a large pot. Bring the water to a boil. Stir to dissolve all the sugar. Turn off the heat and let the tea steep for 15 minutes. Strain the liquid into the gallon jar. When cooled to room temperature, add the unflavored kombucha and cover with the cheesecloth or coffee filter- secured with a rubber band. Wait about 3-4 weeks and you should have a fully formed Scoby. I’m not gonna lie. Scobies are pretty gross, but they are firm and resilient to handling.

It is said they have a tendency to mold- at which point you would need to throw it away and start over- but I have been making kombucha for a year and have yet to encounter any mold. If you are worried, there are many visual examples you can find online.

Believe it or not, this is what a fully formed healthy Scoby looks like:

Homemade kombucha

Now that you have your Scoby, it’s time to make the Kombucha. It’s a very similar process using all the same ingredients, just with different proportions. In general, this first batch is too acidic to drink, but keep 2 C of the liquid for making your kombucha. (You will do this every time you set up a new batch.)

HOMEMADE KOMBUCHA RECIPE

12 C water
1 and 1/4 C granulated white sugar
1/4 C loose tea leaves
2 C of the liquid from your Scoby process

Just like before, place the water, tea, and sugar in a large pot. Bring the water to a boil. Stir to dissolve all the sugar. Turn off the heat and let the tea steep for 15 minutes. Strain the liquid into the gallon jar. When cooled to room temperature, add the unflavored kombucha and the Scoby and cover with the cheesecloth or coffee filter- secured with a rubber band.

Homemade kombucha

You can keep your kombucha at any temperature but remember that the colder it is, the longer the process takes. You can let the kombucha ferment anywhere from 1 week to a month. Since I keep mine at a colder temperature, I usually wait the full month before doing the second fermentation. This is done to add a specific flavor to the kombucha. There are myriad flavor choices for this step and I encourage you to try a few. For this project, I chose ginger and mint as my flavors.

*VERY IMPORTANT SIDE NOTE

When your kombucha is ready, you must put it into sealable bottles for the second flavoring fermentation. I STRONGLY recommend getting 6-8 Grolsch Beers. Drink the beers (duh!) and then use those bottles. I have had several bottles explode from the pressure built up during the second fermentation, but I have NEVER had a Grolsch bottle fail me.

Homemade kombucha

Whatever flavor you choose, pour your kombucha evenly among the bottles, leaving some room for the extra ingredients. Add the juice, ginger, herbs, etc. and then allow these to sit for about a week before drinking. It is perfectly acceptable to open the bottles every 2-3 days to let a little pressure off. This will not detract from the final effervescence.

One gallon usually makes about 6 Grolsch bottles worth.

Homemade kombucha

Homemade kombucha

I know that this was a practice in healthy starts, but let’s face it, we are a wine company, so we couldn’t end the post without coming up with a simple cocktail to show off your new creation. So here for your drinking pleasure, I present:

AFTERPARTY AT THE CO-OP

2 oz ginger mint kombucha
1.5 oz Underwood Pinot Gris
.5 oz Giffard Caribbean Pineapple Liqueur

Measure all ingredients into a shaker, fill with ice, shake heavily and strain into a glass. Enjoy!

Homemade kombucha cocktail

I hope this post will inspire you to try your own kombucha. It’s cheap, easy and fun for the whole family.

Happy New Year and keep those #pinkiesdown.

Photography, Text and Recipes by David L. Reamer.  (@dlreamer)

New Traditions: Christmas Tree Hunting in Mt. Hood National Forest

Mt. Hood is an icon of Portland and the Willamette Valley. The mountain that sits at 11,250 feet in elevation can be seen from numerous parts of the valley. Whether you are stuck on I-5 traffic, on a leisurely drive in the gorge or hiking up in forest park, Mt. Hood peaks through on clear days.

Union Wine Co Christmas Tree Hunt

The Mt. Hood National Forest, which stretches around 1,067,000 acres around the base of the mountain, is a treasured playground that we Oregonians try to take advantage of all year round. Summer activities include camping, swimming at the many lakes and rivers and going on long warm hikes. In the winter there is snowshoeing and skiing, and for those looking for the perfectly unperfect tree, Christmas tree hunting.  

Union Wine Co Christmas Tree Hunt

For some of us who have grown up in the Pacific Northwest, a holiday tradition has been to go out into the woods to find your tree rather than heading to the local tree farm or tree lot.   

Union Wine Co Christmas Tree Hunt

Union Wine Co Christmas Tree Hunt

Union Wine Co Christmas Tree Hunt

We believe the holidays are about spending time with friends and family. So, this year we are sharing new traditions with friends and their young families.  

If you haven’t gotten a tree already, we suggest switching things up this year and start a new tradition. When the weather is just right, it’s a perfect day to get some fresh air and create new memories for your family that will hopefully be passed down for generations. Don’t forget the sled, a few cans of Underwood Bubbles for mom and dad and your $5 permit for the tree. Cheers!

Union Wine Co Christmas Tree Hunt

Artist Spotlight: The Ellaphant in the Room

The Man Behind the Cans 

Jeremy Alan of The Ellaphant in the Room is the mural artist and illustrator behind three of our wine can designs—Riesling Radler, Strawberry Cooler and our most recent undertaking, Nouveau Pinot Noir. The first time we reached out to Alan was for a postcard project. After that experience we thought he might be a perfect designer to create a new can design for us.  

That first design was for our Riesling Radler can. As different and beautiful as the wine it holds, this can is a huge hit with everyone who sees it. Since then we’ve continued to work with The Ellaphant in the Room on two more can designs and another postcard. 

We asked Jeremy if he would answer a few questions for us about his work and the process of designing wine cans.  

  • How did Union Wine Co. start working with you? 
    Union Wine reached out to me in 2016 with a project to illustrate a promotional postcard. The idea was to draw the family of Underwood wine cans…crushed. I loved the idea and the visual possibilities of representing the crushed and folded can. 

Underwood Pinot Noir Illustration

  • Would you please tell us a little bit about you and your work?  
    My company is called The Ellaphant in the Room and is based in Brooklyn. I make hand-painted wall murals and print illustrations. I specialize in designing and painting murals by working with concepts and colors that complement existing interiors. My illustrations are small-scale artworks that are commissioned for both commercial magazines and privately sold for home décor. 

Riesling Radler (Released Summer 2017)

  • How did this project start? 
    Ryan Harms and the designer working on this project reached out by email. This was my first time doing product design and I loved the idea of making an illustration that would wrap around a can. Ryan instantly established an open and collaborative approach to working together. He was open to ideas and made it easy to say yes to partnering for this seasonal wine project.  
  • How did this design come to be?
    We started off with several different ideas. Again, the openness to creative possibilities gave me liberty to pursue a number of possibilities beyond the typical industry wine can design. The illustration was meant to reflect the wine flavor which has notes of citrus, hops, and summertime. We settled on tropical floral patterns as the direction. From there I began drawing tropical flora and fauna. I focused on individual leaves and began to work them into a pattern. Additional elements included tropical birds like toucans and flamingos. One thing I knew right away was that I wanted to have the green leaves be on a dark background. 

Strawberry Cooler (Released Summer of 2019) 

  • Please tell us about the design process for the Strawberry Cooler.
    When Union Wine reached out to me about doing another can design the answer was obviously, yes! We immediately hopped on the phone and started talking.We talked about how the illustration should represent the specific wine flavor and reflect the experience of drinking the wine. With this can we came up with a number of different design directions including a surfboard pattern, a sun setting into the ocean and strawberry dreams with floating strawberries on clouds. These options were sketched out and mocked-up on the cans.  

After numerous directions and ideas were explored, it was time to choose one. Since the wine cooler is strawberry flavored, the chosen theme was a field of strawberry flowers. The flowers were intended to look loosely sketched, as though they were made by someone relaxing in a park—drawing and taking in the summer day. 

The most technical part was positioning the flowers on a diagonal so that when it wrapped around the can, it would connect and appear seamless. 

Underwood Strawberry Cooler Illustration

Another central compositional element is the bumblebee. The bee was intended to look like it was on the label, as though it had landed on the can, attracted to the strawberry flowers. The bumblebee was a perfect addition and echoed the focal point of the toucan on the Radler can. 

Strawberry Cooler Bumblebee


Nouveau (Released November of 2019)

  • The Nouveau can is a design you just completed recently. Was there anything different about creating the design for this one?
    Ryan and Joan called to discuss this project in February—9 months prior to a firm product release date of Nov. 21. This would be a limited release for Nouveau Day, the traditional day that Nouveau wines are released and tasted. That meant I only had about 5 weeks to complete the design.The brief for this project asked that I keep in mind the Underwood logo block on the front of the can as I thought about a few possible esthetic options: Art Nouveau, Bold Colors, Organic Elements, Architectural Elements, and the brief said I could be a little bit more “out there” for this style of wine compared to more typical Nouveau wine labels. After my conversation with Ryan and Joan, the first thing I did was to research Art Nouveau. It had been a while since studying the movement and I wanted to re-establish an understanding of the motivations and visual languages of the time.  
  • What were some of the other directions you were thinking about before we landed on the peacock design?
    Some very cool directions emerged. I explored Architectural linework from the period as framing the label. One version had a fairy holding the ingredients of the wine and sitting atop the label. Peacocks were instantly intriguing along with dragonfly patterns and moths. In the end we chose the peacock with the tail feathers draping all the way around the can. The feathers evoke the sinuous lines of Art Nouveau architecture and the white peacock has graphic contrasts against the dark green can. A further thought on the white peacock is it almost subverts the expectations of the image since peacocks are usually vibrant, full-spectrum color…in a sense it made him more unique. The whimsy and freedom of illustration allows you to interpret the real world instead of relying on it. Hopefully, within that interpretation, I can direct the viewer towards the unique experience of the wine. 
  • Does anything stand out from when you designed any of the cans—something unique you remember?
    The opportunity to dive into art history as the inspiration point for the Nouveau can was particularly exciting for me. Beginning with such an iconic style from history and to make it our own take was the challenge. 
  • You’ve designed three cans now, and although they are quite different from one another, they look great side-by-side. What is similar and what is different about the three designs, and why do they work so well together? 
    Each of the Union wine cans have different concepts driving the image, style and color decisions. One difference is how finished and complete the images are for the Radler and Nouveau, the Radler and Nouveau are both fully colored-in set against a dark background. The Strawberry can is intended to look like a sketch, open and loose with pencil lines and soft hits of water-colored pigments. As for similarities, their differences complement each other, they hopefully balance each other out. Additionally, each is based on patterns and images from nature and are all from my hand, unified by my mark and line. 

What is a Radler?

Underwood Radler

Traditionally a radler is a low alcohol (sessionable) beer-based beverage. Usually consisting of half beer (something light like a pilsner or wheat beer) and half lemonade (grapefruit juice is also common). Originating in Germany, radler roughly translates to cyclist. As the story goes, one hot day in 1922, an innkeeper in the Bavarian countryside mixed lemonade with beer to create a refreshing, quaffable beverage for all the cyclists riding by. Some say part of the reasoning behind this was because the innkeeper was running out of beer and needed to create a product that he could continue to serve.

Another common term you’ll hear referring to a beer based beverage mixed with a carbonated lemon/lime juice is a shandy. The shandy originated in Britain in the 1850s and was traditionally mixed with ginger.

What is our Riesling Radler?

Underwood Riesling Radler

We’re not precious about our wine. Like a traditional radler, ours emulates the flavors of hops and citrus (we use grapefruit puree), yet adds Oregon riesling to bring a crisp and refreshing approach. Our Riesling Radler is gluten-free with a 3% alcohol level, a perfect pairing for the hot summer months. 

Learn more about the story behind our Riesling Radler here.

Underwood Riesling Radler Cocktails

Another way to enjoy our Riesling Radler

While one of the things we love about our Riesling Radler is it’s sessionable quality, sometimes you want a little more to it. Or, if you are running low on the radler, this helps make it last longer. It’s the perfect base for a cocktail and is asking for a spirit with a pronounced character. The smokiness from the mezcal balances well with the sweet notes from the radler.

Serves 2

1 can Underwood Riesling Radler
2 oz Mezcal Unión
Lime and orange slices
Ice

Grab 2 old fashioned cocktail glasses and add ice to each glass. Pour 1oz of mezcal into each glass. Pour half a can of Riesling Radler equally into the glasses. Squeeze a slice of lime and orange into each glass. Top with extra citrus slices, stir and enjoy.

Cheers!

Underwood Riesling Radler

Underwood Riesling Radler

Underwood Riesling Radler

Thanks to our friends at Mazama Wares for the colorful cocktail glassware.