Posts Tagged: underwood pinot gris

A Step by Step Guide to Surviving Election Day

Election supplies

The day is finally upon us! Are you excited? Nervous? Stressed? Completely over it and checked out? We’re right there with you. One thing we can all agree on is that stress levels are at an all time high, but we believe the key to getting through the madness is to slow down and stock up on all of your tried and true creature comforts.  And we’re here to help. So here’s the plan:

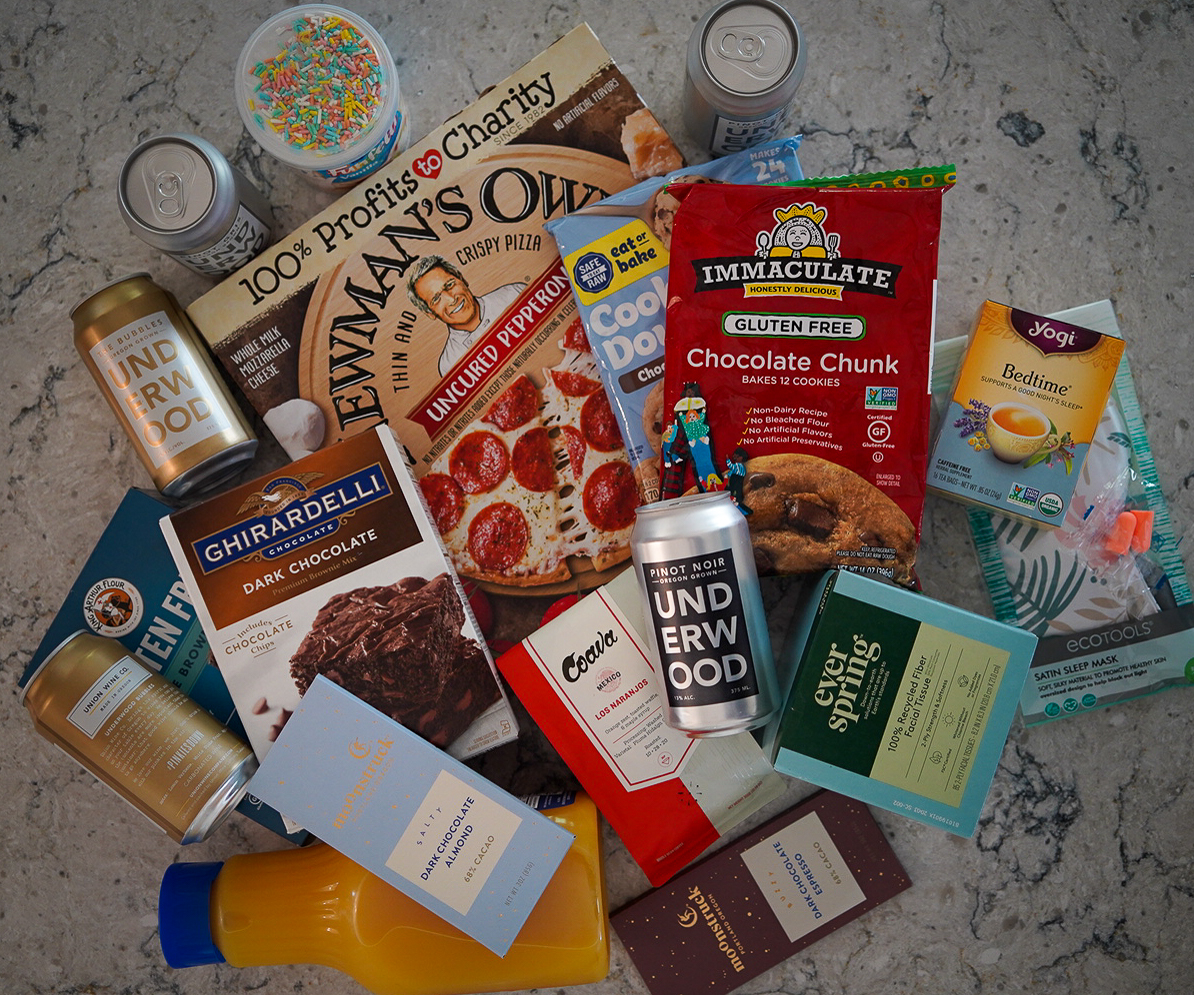
STEP 1: Stock up on the essentials! What are your go-to comfort foods? Make a list of the things that make you feel the coziest and head to the store. Here’s what’s on our list:

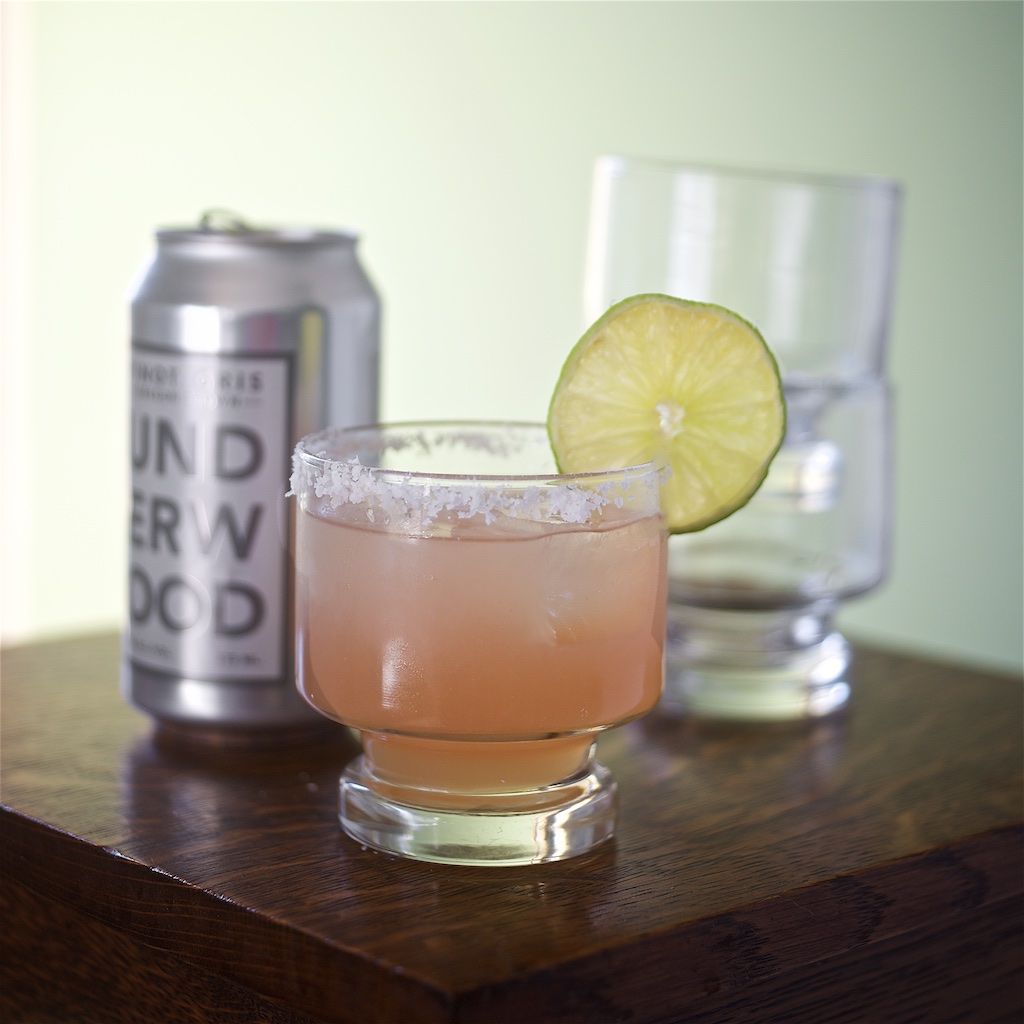
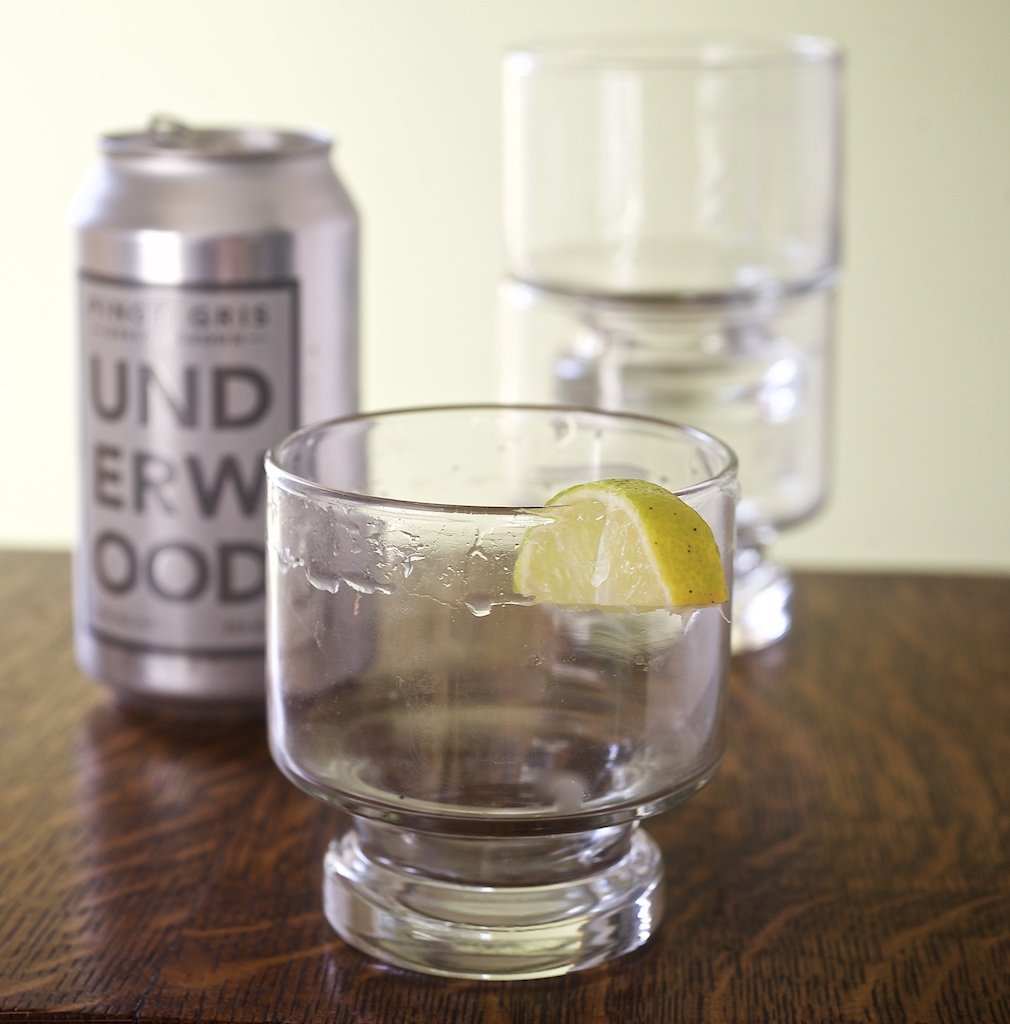
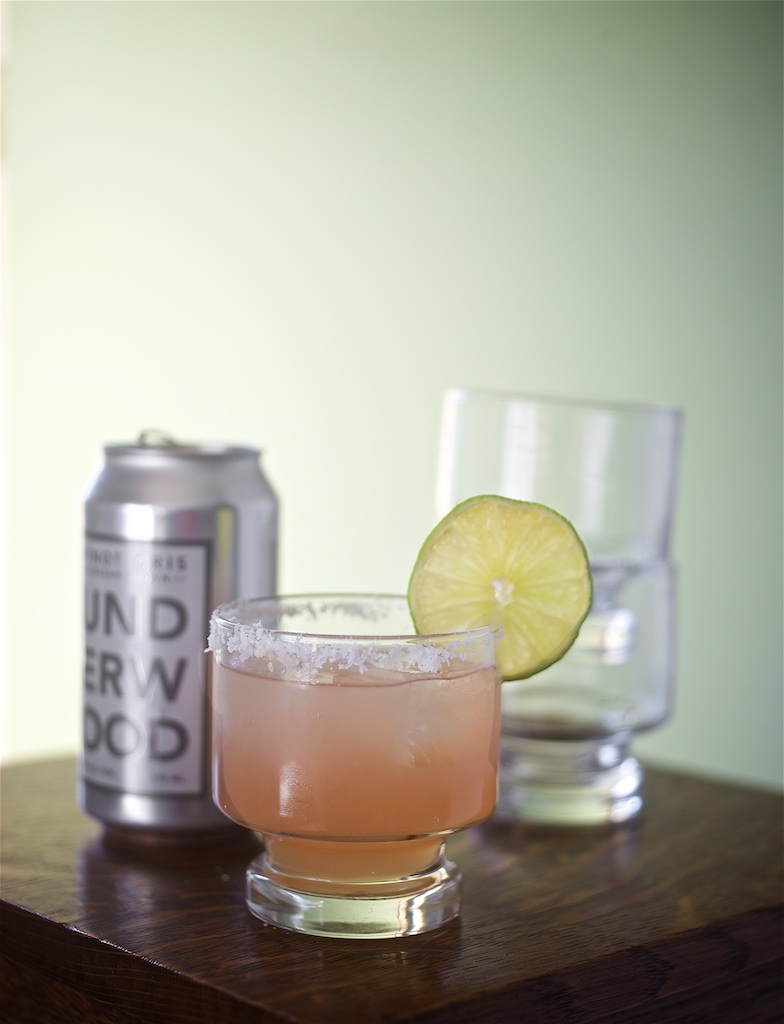
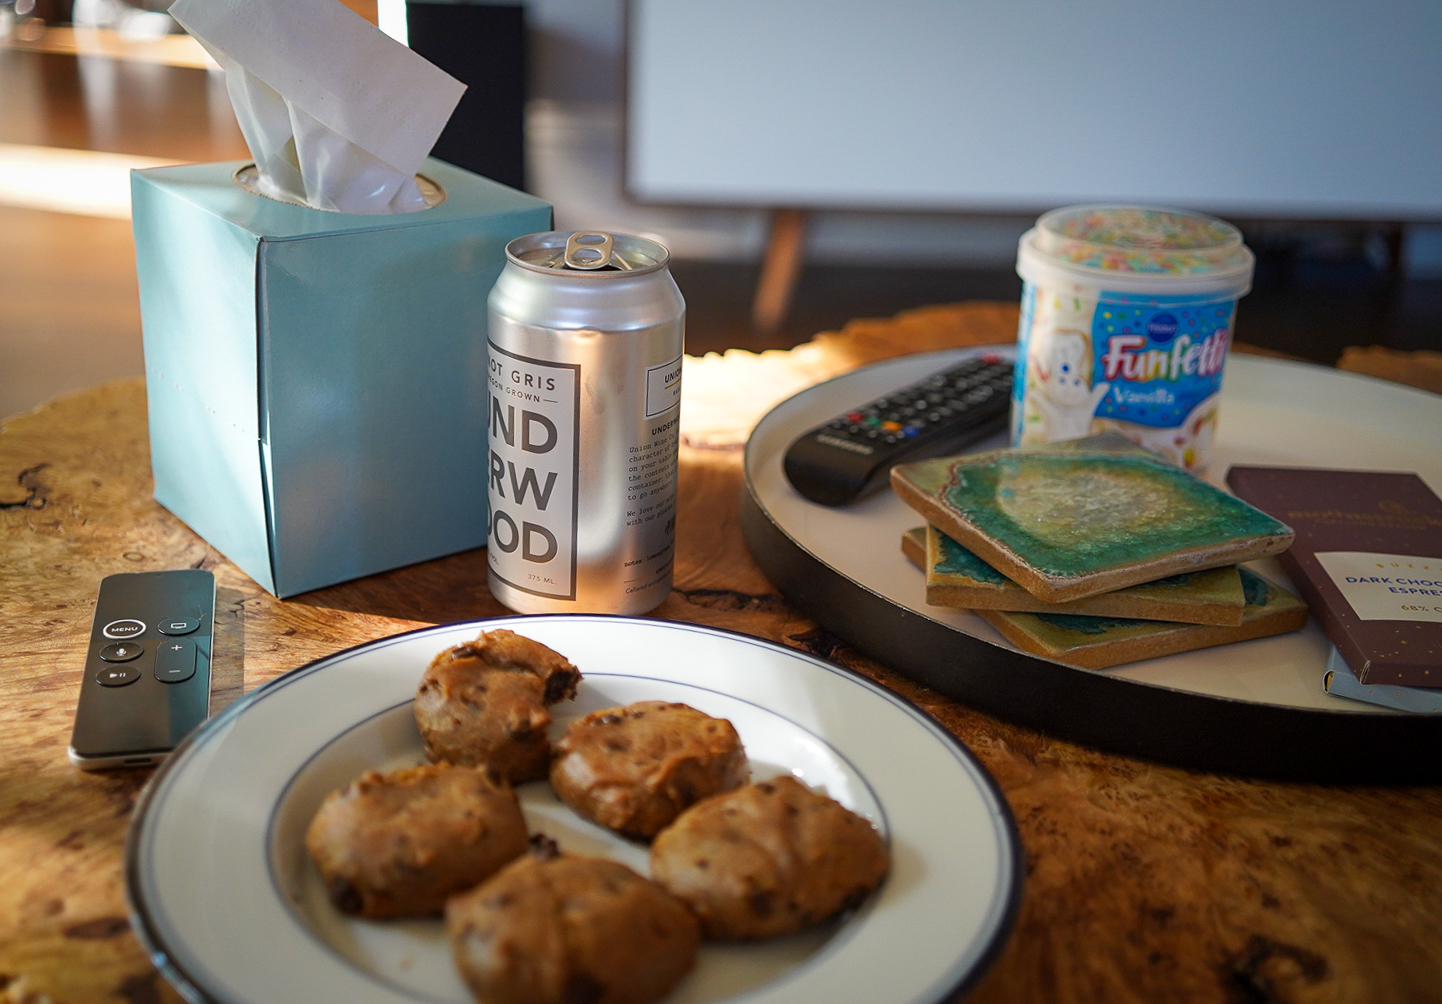
a. Underwood Canned Wine (duh)

b. Frozen Pizza

c. Brownies + Chocolate + Frosting (go big or go home!)

d. Cookie Dough

e. Tissues…maybe we will cry tears of joy? Either way be prepared!

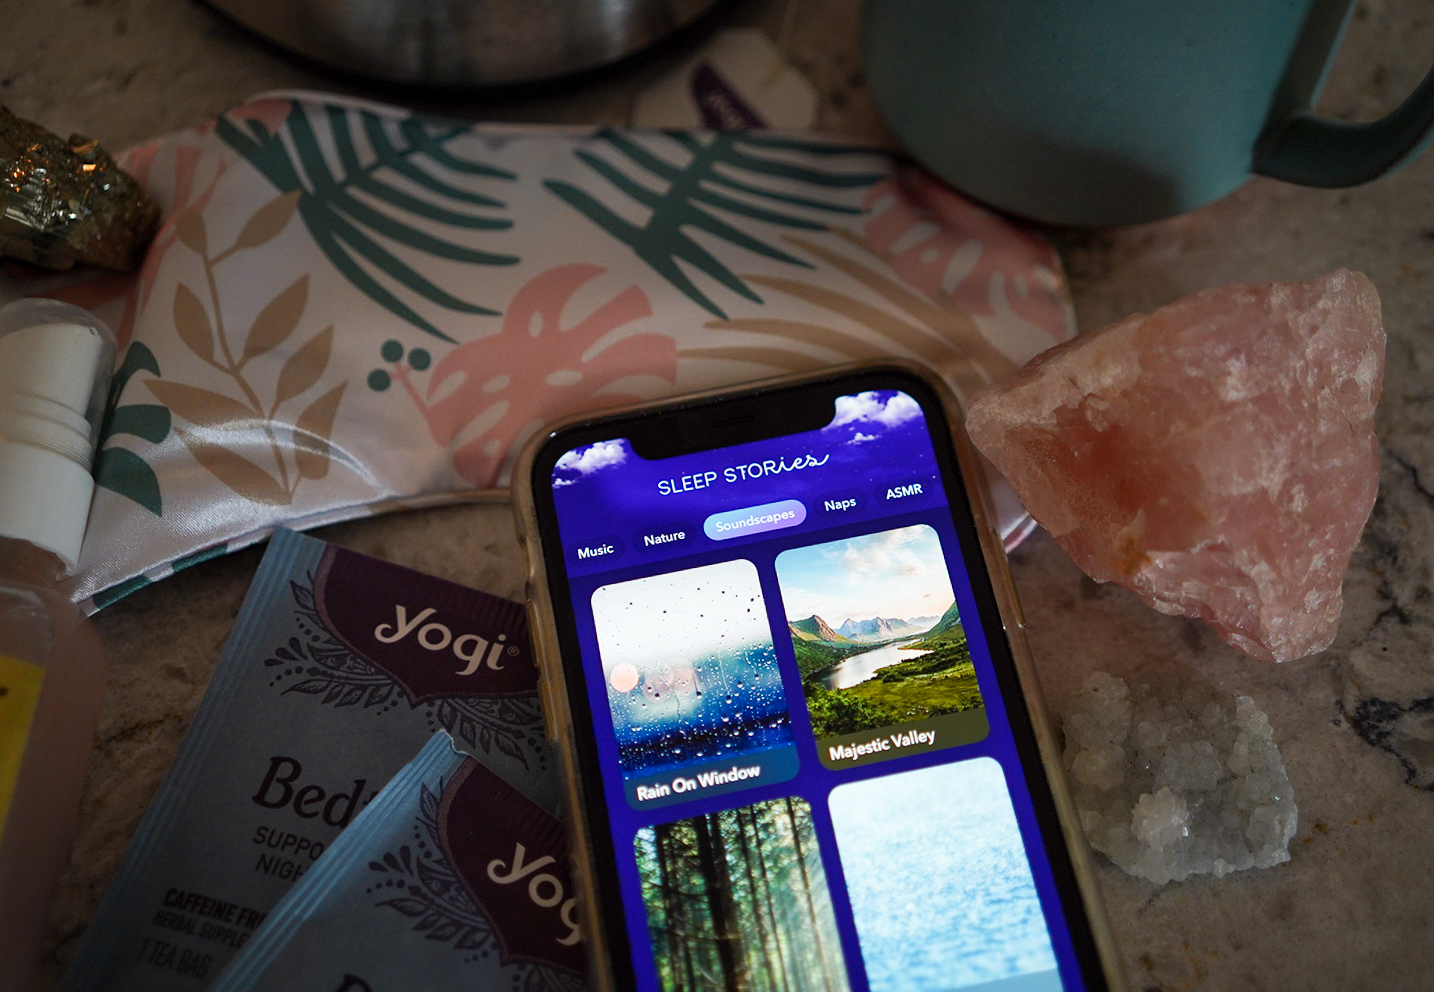
f. Bedtime Necessities
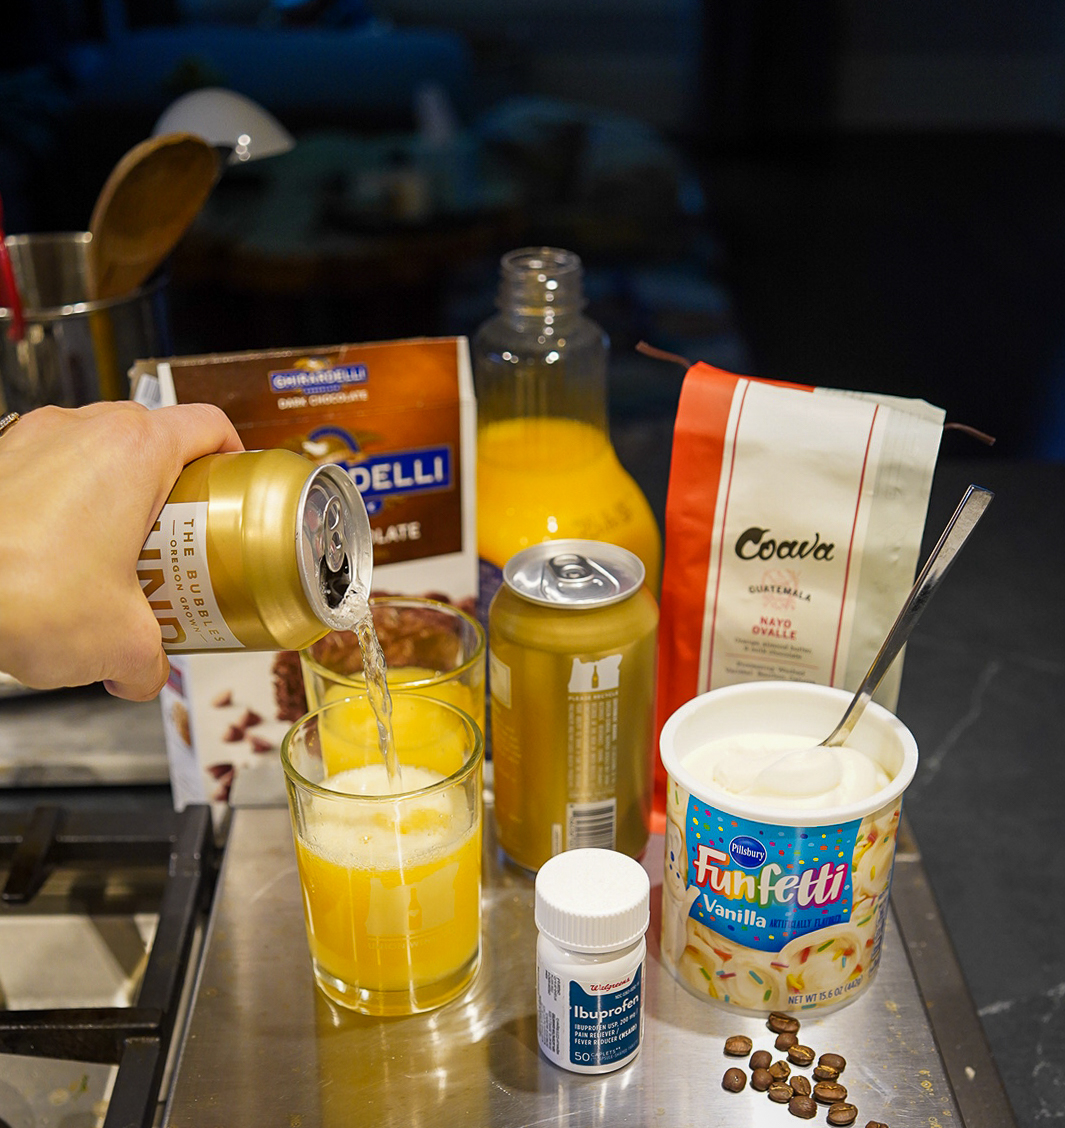
g. Coffee

h. Advil

i. Underwood Bubbles

j. Juice

2)  Prepare: Get comfy and don’t forget your mental health

a. Download your favorite meditation or relaxation app in-case you need to take a little break…or a few.

b. Put on your pj’s, it’s going to be a long night
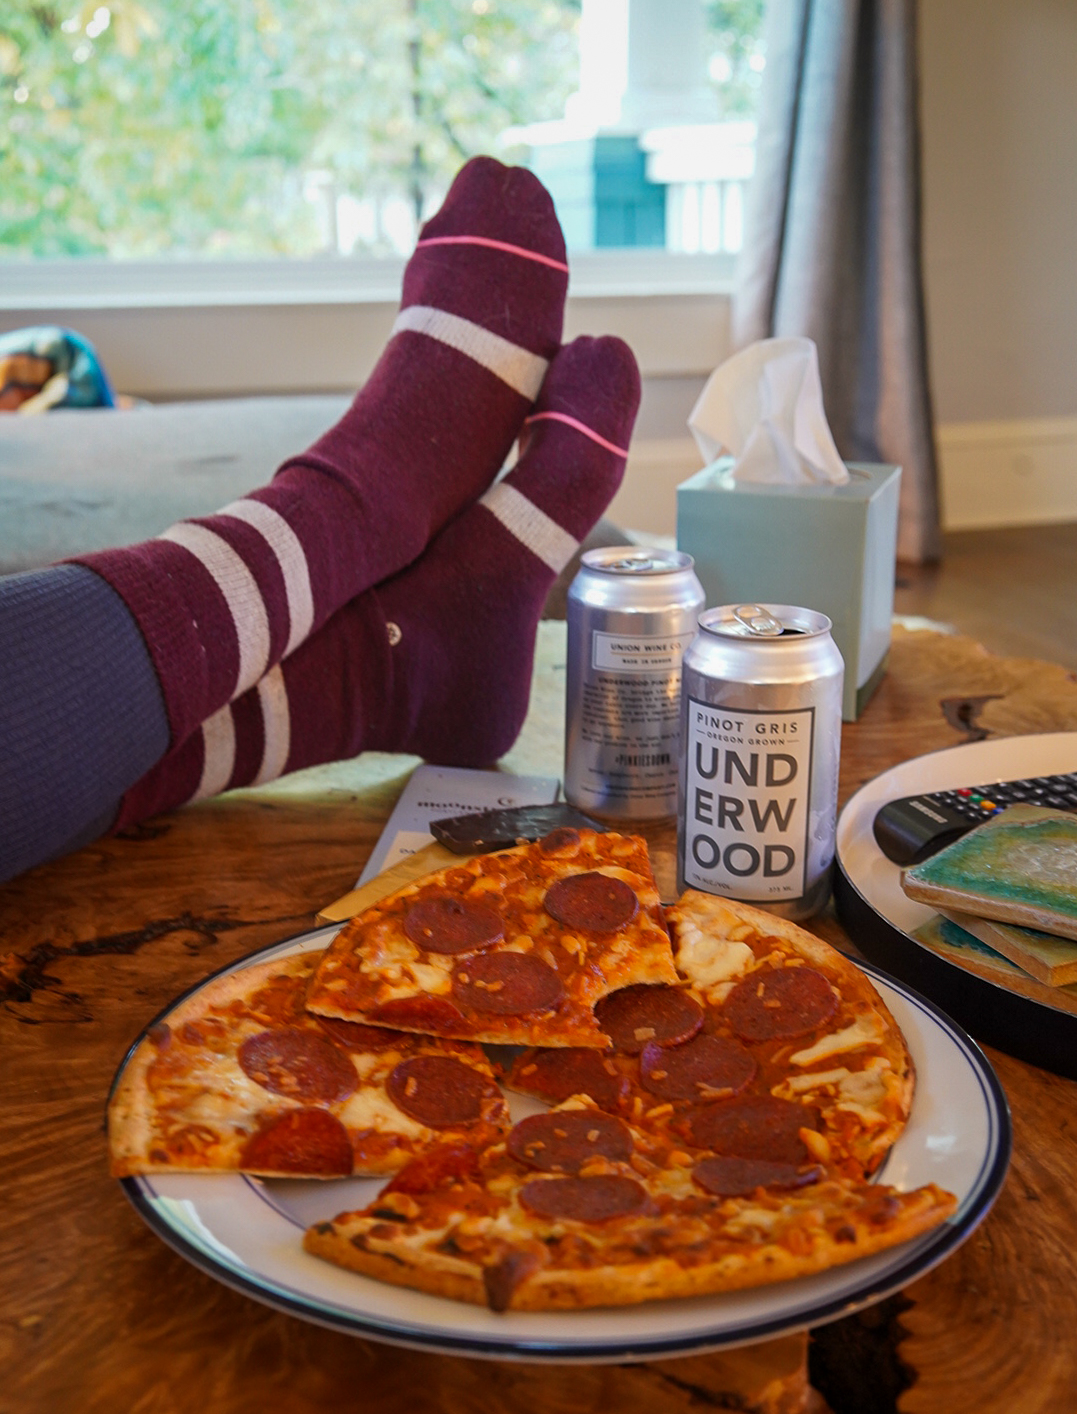
3)  Here we go!

a. Pop open that can, or cans, or bottles.

b. Get to work on that pizza. Make sure to have a side of treats close by. We give you full permission to eat the whole pizza. Stress eating is normal and natural, we won’t judge.

c. Don’t forget that outside exists! Go for a walk, play with your pup, or just get some fresh air. It’s 100% ok to leave the house in PJ’s and sneakers. Maybe the only good thing to happen in 2020?

4)  Re-coop

a. Make yourself a cup of sleepy time tea

b. Draw yourself a bath, light some candles, set out the crystals

c. Grab an eye mask and some earplugs

d. Put on some soothing tunes and doze off

5)  Good morning! Congratulations! You made it! Celebrate with an extra cup of coffee, or a mimosa if you are waking up to good news! You deserve it.

Pro tip: brownies are an acceptable breakfast choice today.

Cheers!

#pinkiesdown

Chefs at Home Series: Taco Tuesday with Jason French & Viola

Chef, consultant (and all-around great dude) Jason French has been a bastion of the Portland restaurant world for nearly twenty years. He ran the kitchen at Paley’s Place and helped open Clark Lewis before heading out on his own to open Ned Ludd and then Elder Hall. Thirteen years later, he can still be found where he is most comfortable…in his kitchen.

When Jason cooks at home, he often employs the help of his daughter Viola. Nearly thirteen herself, she has definitely followed in her father’s footsteps, honing her own kitchen skills. We asked Jason if we could hang out and get a (literal) taste of what kind of cooking he and his daughter collaborate on. He immediately suggested Taco Tuesday, a great way to spice up an otherwise bland day.

Jason chose to make Roasted Chicken, Squash, and Tomatillo Tacos with Refried Beans and Viola’s signature Guacamole.

For the tacos:
4 boneless skinless chicken thighs
1 cup whole tomatillos, husked
1 medium summer squash, trimmed and cubed (seasonally, acorn or butternut squash may be substituted)
1 C chicken stock
1 T cumin seed, ground
2 T chili powder
1/2 tsp cayenne
Salt and pepper

Preheat your oven to 475 degrees. Peel the husks from your tomatillos.

Cut your squash into large chunks.

Cut the chicken thighs in half, place all the ingredients into a large bowl, and season well.

Separate out in a single layer of a sheet pan and put into the oven. Roast for 25-30 minutes, until chicken is fully cooked and the squash is golden brown.

Cut up the chicken and half of the squash. Put into a heavy-bottomed pot.

Put the roasted tomatillos, remaining squash, and the chicken stock into a large blender. Pulse until chunky and add to the pot.

Keep warm on the stove while you prepare the rest of the food.

While her dad is taking care of all that, Viola is in charge of the guacamole.

For the Guacamole:
1 large ripe avocado
1 T fresh lime juice
2 tsp cumin
Salt and pepper to taste

Cut the avocado in half, remove the pit and scoop all the flesh into a bowl. Add the other ingredients and mix well. Adjust seasoning as needed.

And of course, get the chefs final approval…

Set the guacamole aside and make the refried beans. In a pinch, there is no shame in using canned refried beans, but if you have the time, and an extra set of hands to help, homemade is always best.

For the Refried Beans:
1 T olive oil or lard + 3 T more for frying
1 small onion, peeled and minced
1 clove garlic, peeled and smashed
1 T fresh oregano or 1/2 tsp dried Mexican oregano
2 C cooked pinto, black or red kidney beans, drained
1 C chicken stock
Salt and pepper

To make the beans, heat 1 T of oil and slowly cook the onions and garlic until just starting to color. Add the beans, oregano, a pinch of salt and pepper, and the chicken stock. Simmer on low heat for 15 minutes. Put everything in a food processor and blend until smooth.

In a heavy-bottomed pan, add the remaining oil until hot, add the beans and reduce to a simmer. Cook until the beans achieve the desired consistency, continually scraping all the “crusty goodness” off the bottom as it cooks. Adjust seasoning and set aside.

Once everything is ready, finish up your Fixins.

Fixins:
(Feel free to add/subtract whatever makes you happy)
corn tortillas, hard or soft, served warm with dinner
fresh limes, quartered
grated cheddar or Mexican style cheeses like Cotija
scallions, thinly sliced
French radishes, thinly sliced
pickled jalapenos, canned are supreme
fresh cilantro leaves

Finally, heat your tortillas over an open flame (or on an electric burner) and keep warm.

With perfect timing, Jason’s girlfriend Carrie happened to come home just as the last tortillas were being cooked. A bottle of Underwood Pinot Gris was opened and the French Family dinner was a complete success.

We want to thank Jason and his family for sharing their Taco Tuesday with us. If you are somehow unacquainted with Jason’s work, you can check out his restaurant, Ned Ludd, and his event space Elder Hall. In his spare time, Jason also works as a personal coach and consultant.

Finally, from everyone here in the Union Family, we hope you are staying safe. And please get out there and VOTE!

Photography and Text by David L. Reamer. (@dlreamer)
Recipes by Jason French. (@jasonffrench)
Guacamole by Viola.

Late Summer BBQ Skewers: Go Big or Go Home

I honestly don’t know how the whole thing got started. When most people think BBQ skewers, they envision a full meal on a stick: chicken next to onions next to peppers next to more (raw) chicken. You even see this at many meat counters around town. But that’s just not the way to get the job done. Ignoring for a moment that you really don’t want your raw chicken, seafood, or beef crammed up next to your uncooked veggies, all of those ingredients have different cooking times, and it’s crazy to think they can all be cooked correctly, all jammed together, over an open flame. And since undercooked protein is never an option, it’s always the poor veggies that suffer.

But don’t fret, we’ve got you covered. There are two main rules for successful BBQ skewers. First, each ingredient gets it’s own skewer, and secondly, go big with your ingredients and cut sizes, ensuring that everything stays safely secured to their sticks during cooking. You can always cut everything smaller before serving. I found it best years ago to invest in metal skewers but if you use wooden ones, just make sure to soak them in water for several hours beforehand so they don’t burn on the grill.

With this approach to your dinner, you will want to have a slightly more involved game plan for the meal, since you will need to remove all the cooked food from the skewers before serving. So what we planned was a family-style meal of grilled shrimp and vegetables with Soy Vay Teriyaki Sauce and fresh Rau Ram (Vietnamese Coriander—more on that in a bit) over rice. Here’s what you will need to feed 2-3 people:

1 large sweet onion
1 large red bell pepper
1 large yellow bell pepper
About 8 large crimini mushrooms
8 to 10 large Tiger Prawns
1 bottle Soy Vay Veri Veri Teriyaki Sauce
1 & 1/2 C uncooked white (or brown if you prefer) rice
1 bunch of fresh Rau Ram
Olive Oil, kosher salt and cracked black pepper
1 ice-cold bottle of Underwood Pinot Gris

In these times of COVID, when I have a long shopping list, I will go to a big supermarket. But when I only need a few ingredients, I have been going out of my way to visit and support some of the small and often times open-air markets around Portland. Right down the street from my studio is a small produce market called Berry Good Produce (5523 SE 28th Ave). I picked up my peppers, onions, and mushrooms there. They always have a great selection of locally grown fruits and vegetables and no long checkout lines.

Next, I swung by ABC Seafood (6509 SE Powell Blvd). If you’ve never been, it is definitely worth checking out. For a very small shop, they have an amazing selection of locally caught seafood. It’s the only place around town to get fresh large Tiger Prawns. During Dungeness crab season, their live selection and prices are unbeatable.

I was also able to pick up some fresh Rau Ram there. If you’ve never tried this herb, it’s wildly memorable, to say the least. It’s kind of like a cross between basil and cilantro, but also has a distinct flavor, unlike any other herb I have ever come across. Here it is pictured below. Once you try it, you will always be able to immediately identify it.

You can pick up the Soy Vay at most small supermarkets. This is a delicious and versatile product that we will be using both as a marinade for the shrimp and as a sauce on our final dish.

Now that our shopping is done, let’s get to prepping. Years ago, when I was cooking at Paley’s Place, a dishwasher there showed me a quick and painless way to peel and clean ‘shell on’ shrimp. With a pair of kitchen scissors, clip halfway down the top of the shrimp, just cutting slightly into the flesh, to both make peeling easier and opening up a channel to “devein” it as well. (That’s when you remove the little center intestinal track.)

To prep out the onion, cut it in half straight through the base, peel it, and then cut each half into segments, leaving just a little bit of the stem to hold the pieces together like this:

And now we can finally get to skewering!

I try to cut the peppers into large uneven shapes to make them more secure and pick up better grill marks:

People often ask how to skewer mushrooms without having them split. Well, the first way is to get bigger mushrooms so there is more to work with, but also, if you skewer them at an angle, instead of straight through the stem, they will hold much more firmly, and also have more of the cap open to the grill surface:

Finally, I always skewer my shrimp fat side down to make sure the tip goes straight through the thickest part, rotating 45 degrees each time:

Once these are all complete, fire up your grill and start cooking your rice. Pour 3 Tbs of the marinade over the shrimp skewer and liberally oil, salt, and pepper the vegetable skewers. When the grill is good and hot, place the skewers on and tend to each as necessary, flipping and removing each when cooked through.

Allow the skewers to cool slightly and then remove the shrimp and veggies. You can leave everything whole or cut into smaller pieces at this point. Put everything into a bowl and mix in another 1/4 C of the Soy Vay. Spread your cooked rice on a platter and spoon the shrimp and veggies over the top. Garish with the fresh Rau Ram leaves.

Get out the chopsticks, crack open your ice-cold bottle of Underwood Pinot Gris and you are in business!

Bon Appétit, please stay safe out there and keep those
#pinkiesdown.

Happy Labor Day Everybody!

********

Photography, Text, and Recipe by David L. Reamer. (@dlreamer)

Virtual Happy Hour: The Newest Way to Stay Connected

Salty Dog Cocktail

In these crazy times of social distancing and isolation, it’s as important as ever to stay connected any way you can. Thus, the advent of the virtual happy hour. This is the newest trend that has caught on not just between family and friends, but workmates as well. Now, happy hour used to be a firm 5 PM, but with co-workers and family often times being all around the country, that rule has had to loosen up a bit. If we choose to join in from the West Coast with our East Coast compatriots, we might find ourselves having a drink around 3 pm.

So we decided to create a light cocktail using our Underwood Pinot Gris for when you need to start the party a little earlier than expected. We also wanted to try and use ingredients that most people have around the house since as we all know, running out to the supermarket just isn’t as easy as it used to be. This is a perfect time to remind everyone that the Union Wine Co. shipping team is working tirelessly to get wine sent out to homes across the country. A four-pack of cans equals 2 full bottles in volume and is easily shipped without the hassle of all the extra packaging to protect the glass. You can order cans for yourself or surprise a friend or family member with an unexpected gift right HERE.

OK, back to the cocktail. We created a sort of amalgamation of two classic cocktails, the Moscow Mule and the Salty Dog, and replaced the liquor with our Pinot Gris. We call this one The Salty Underwood Mule. We figure most people are keeping their vitamin C levels up, so you might have grapefruits at your house, and many people have fresh mint growing in the yard already. So, all you need is fresh ginger and you are most of the way to the cocktail.

The Salty Underwood Mule

2 oz fresh grapefruit juice
1.5 oz Underwood Pinot Gris
.5 oz Ginger Mint Syrup (recipe to follow)
Club Soda
1 lime
Salt for the rim of the glass

Mint

The first thing you will need to do is make the ginger mint syrup. At best you have some mint growing in your yard (or maybe a neighbor does who wouldn’t mind sharing.)

STEP ONE:

In a sauté pan, put 3/4 C of water, 1 C of sugar and 2 good sized pieced of fresh ginger (its not necessary to peel the ginger) and bring to a boil. Allow this to cool completely.

Ginger

STEP TWO:

Remove the ginger, pour the liquid into a glass jar and add 3 or 4 sprigs of fresh mint. Allow this to sit overnight. By adding the mint after the liquid has cooled prevents it from turning black and also adds a great subtle fresh mint flavor to the syrup which strengthens over time.

Mint Simple Syrup

Once this is done, you are just about ready to make your cocktail. But first you have to salt the rim. This can be a bit more challenging than you would think. One trick I learned from my bartender friends is to run a lime wedge around the edge of the glass as opposed to dipping it in water (which is what I used to do). I’m not sure why, but using citrus ensures a much more even coating of salt to remain on the rim.

Salt Mule Cocktail

Next, pour some salt into a shallow bowl and press the glass firmly into the salt for an even coating.

Salty Mule Cocktail

And voilá…

Salty Mule Cocktail

Add a few ice cubes, the grapefruit juice, Pinot Gris and Ginger Mint syrup. Give a gentle stir, top off with a splash of club soda and garnish with a lime wedge.

Salty Mule Cocktail

And there you have a deliciously light afternoon cocktail to virtually toast with friends and family.

We hope you will enjoy this new cocktail creation while staying safe out there! Keep washing your hands and don’t forget to keep those #pinkiesdown.

Salty Mule Cocktail

Photography, Text and Recipe by David L. Reamer. (@dlreamer)

A Healthy Start to the New Year: Making your own Kombucha

Homemade kombucha

In many ways, 2019 was a challenging year. (I think you know what I mean…) Well, we can’t control everything, but what we can do is look inward and start the new year with some healthy routines to keep the mind and body feeling great. The time for New Year’s resolutions is here again.

I can honestly say that just a few years ago I had never even heard of kombucha, but now it is a huge part of my diet and life. For the uninitiated, kombucha is simply a deliciously funky beverage made by fermenting sugar and tea with a SCOBY (Symbiotic Culture of Bacteria and Yeast). This process creates living probiotic bacteria that are wonderful for digestion and all around general health.

When I looked into making kombucha at home, I couldn’t believe how easy and inexpensive it was. I did several test runs and came up with a recipe that is delicious and consistent, but I encourage you to adjust the ingredients as you see fit for a sweeter, more sour or less carbonated finished product.
The first step in making kombucha is to make a healthy SCOBY. This will become the soul and backbone of your kombucha. (I named mine Scoby-Wan Kanobi.) This process is similar to the actual making of kombucha but must be done first. Here’s what you will need:

MAKING A STRONG SCOBY

A One Gallon Glass Jar
Cheesecloth or Paper Coffee Filters
4 C store bought unflavored kombucha*
2 T tea*
1/2 C regular granulated white sugar
1 Quart tap water

*For this, I recommend two local shops right across the street from each other on SE Belmont Street. First head over to the Soma Kombucha Taproom to pick up your unflavored kombucha. Feel free to bring your own Mason Jars. Then head across the street to The Tao of Tea to pick up the loose tea you need. I experimented with many teas but found the Malty Assan always seemed to work the best.

Homemade kombucha

Place the water, tea, and sugar in a large pot. Bring the water to a boil. Stir to dissolve all the sugar. Turn off the heat and let the tea steep for 15 minutes. Strain the liquid into the gallon jar. When cooled to room temperature, add the unflavored kombucha and cover with the cheesecloth or coffee filter- secured with a rubber band. Wait about 3-4 weeks and you should have a fully formed Scoby. I’m not gonna lie. Scobies are pretty gross, but they are firm and resilient to handling.

It is said they have a tendency to mold- at which point you would need to throw it away and start over- but I have been making kombucha for a year and have yet to encounter any mold. If you are worried, there are many visual examples you can find online.

Believe it or not, this is what a fully formed healthy Scoby looks like:

Homemade kombucha

Now that you have your Scoby, it’s time to make the Kombucha. It’s a very similar process using all the same ingredients, just with different proportions. In general, this first batch is too acidic to drink, but keep 2 C of the liquid for making your kombucha. (You will do this every time you set up a new batch.)

HOMEMADE KOMBUCHA RECIPE

12 C water
1 and 1/4 C granulated white sugar
1/4 C loose tea leaves
2 C of the liquid from your Scoby process

Just like before, place the water, tea, and sugar in a large pot. Bring the water to a boil. Stir to dissolve all the sugar. Turn off the heat and let the tea steep for 15 minutes. Strain the liquid into the gallon jar. When cooled to room temperature, add the unflavored kombucha and the Scoby and cover with the cheesecloth or coffee filter- secured with a rubber band.

Homemade kombucha

You can keep your kombucha at any temperature but remember that the colder it is, the longer the process takes. You can let the kombucha ferment anywhere from 1 week to a month. Since I keep mine at a colder temperature, I usually wait the full month before doing the second fermentation. This is done to add a specific flavor to the kombucha. There are myriad flavor choices for this step and I encourage you to try a few. For this project, I chose ginger and mint as my flavors.

*VERY IMPORTANT SIDE NOTE

When your kombucha is ready, you must put it into sealable bottles for the second flavoring fermentation. I STRONGLY recommend getting 6-8 Grolsch Beers. Drink the beers (duh!) and then use those bottles. I have had several bottles explode from the pressure built up during the second fermentation, but I have NEVER had a Grolsch bottle fail me.

Homemade kombucha

Whatever flavor you choose, pour your kombucha evenly among the bottles, leaving some room for the extra ingredients. Add the juice, ginger, herbs, etc. and then allow these to sit for about a week before drinking. It is perfectly acceptable to open the bottles every 2-3 days to let a little pressure off. This will not detract from the final effervescence.

One gallon usually makes about 6 Grolsch bottles worth.

Homemade kombucha

Homemade kombucha

I know that this was a practice in healthy starts, but let’s face it, we are a wine company, so we couldn’t end the post without coming up with a simple cocktail to show off your new creation. So here for your drinking pleasure, I present:

AFTERPARTY AT THE CO-OP

2 oz ginger mint kombucha
1.5 oz Underwood Pinot Gris
.5 oz Giffard Caribbean Pineapple Liqueur

Measure all ingredients into a shaker, fill with ice, shake heavily and strain into a glass. Enjoy!

Homemade kombucha cocktail

I hope this post will inspire you to try your own kombucha. It’s cheap, easy and fun for the whole family.

Happy New Year and keep those #pinkiesdown.

Photography, Text and Recipes by David L. Reamer.  (@dlreamer)